Previous articleThrough a simple example, we will teach you how to perform automation settings in Home Assistant. Today, we will use the automation setting "notify when the washing machine is finished" to introduce how to use the Blueprint function to quickly complete the automation settings, allowing you to No more worrying about how to set triggers, conditions, and actions! (If you’re lazy, you’ll be even more lazy! 🤣) At the same time, it can be paired with Google Assistant to achieve the effect of voice reminder!
Table of contents
First let’s get to know Blueprint
Blueprints are automated setting templates. Home Assistant has officially launched a small number of Blueprints, but more are shared by Home Assistant community netizens. You can quickly complete your own automated settings through these Blueprints shared by everyone.
Home Assistant Blueprint Fourm:https://community.home-assistant.io/c/blueprints-exchange/53
Here you can find all kinds of Blueprints. Through everyone's efforts, all kinds of automated setting Blueprints you can think of are available here!
Step 1. Import the "Appliance has finished" Blueprint
In today's example of "notifying when the washing machine is ready", we will use the Blueprint "Appliance has finished".
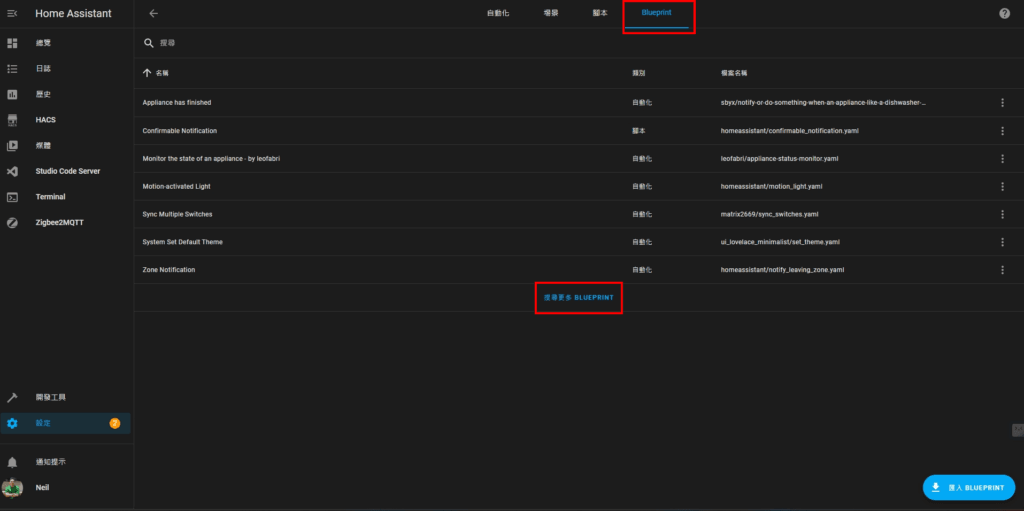
Step 1-1. "Settings" ➜ "Automation and Scenarios" ➜ "Blueprint" ➜ "Search for more Blueprints"
It will then be linked to Blueprint Exchange Forum
Step 1-2. Find the “Appliance has finished” Blueprint
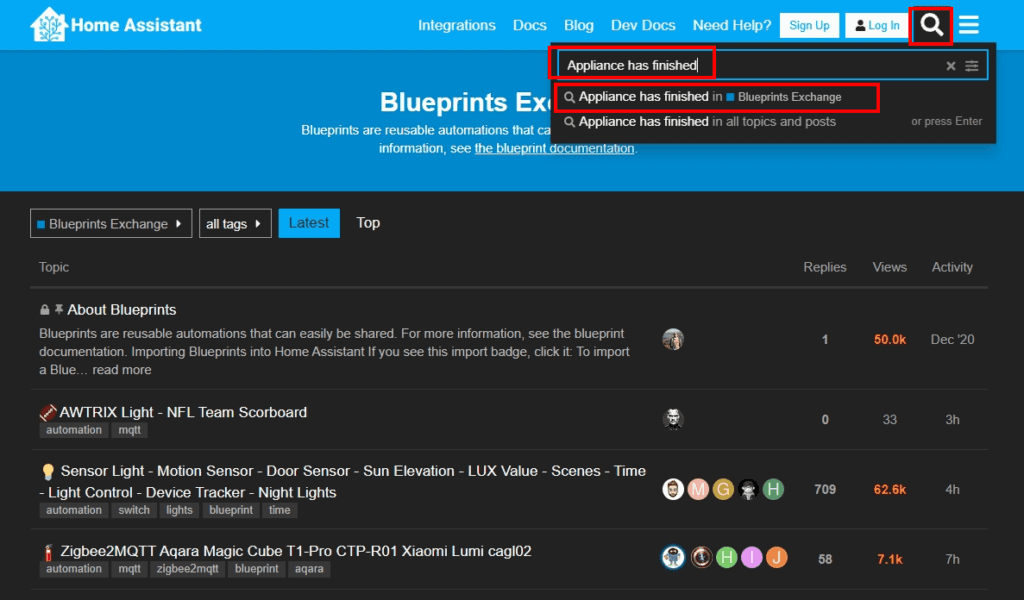
- exist Blueprint Exchange Forum Enter "Appliance has finished" in the search input box
- Select "Appliance has finished in Blueprint Exchange"
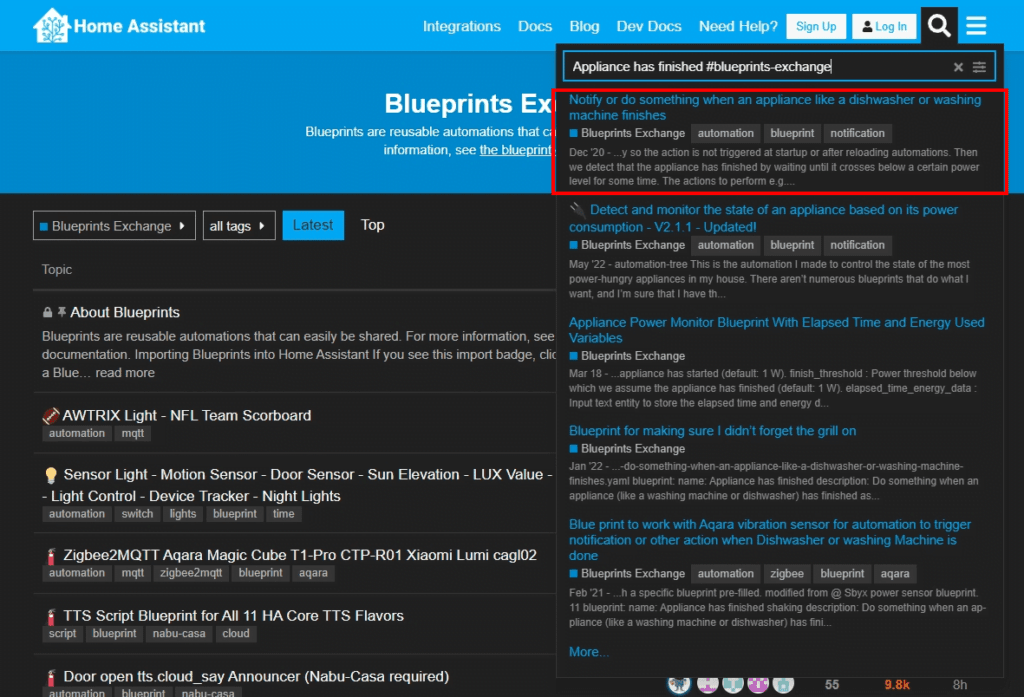
- Select the first article "Notify or do something when an appliance like a dishwasher or washing machine finishes", or go directly to this link:https://community.home-assistant.io/t/notify-or-do-something-when-an-appliance-like-a-dishwasher-or-washing-machine-finishes/254841
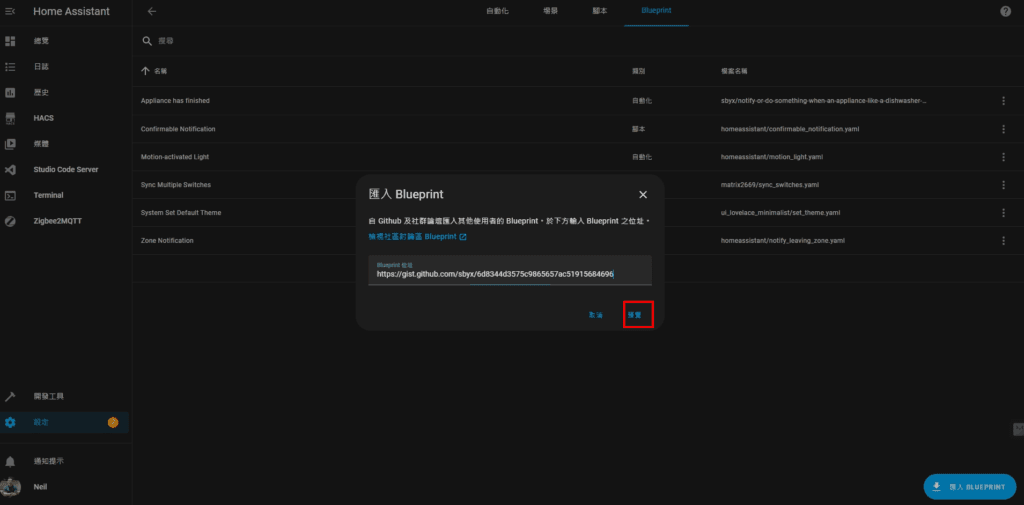
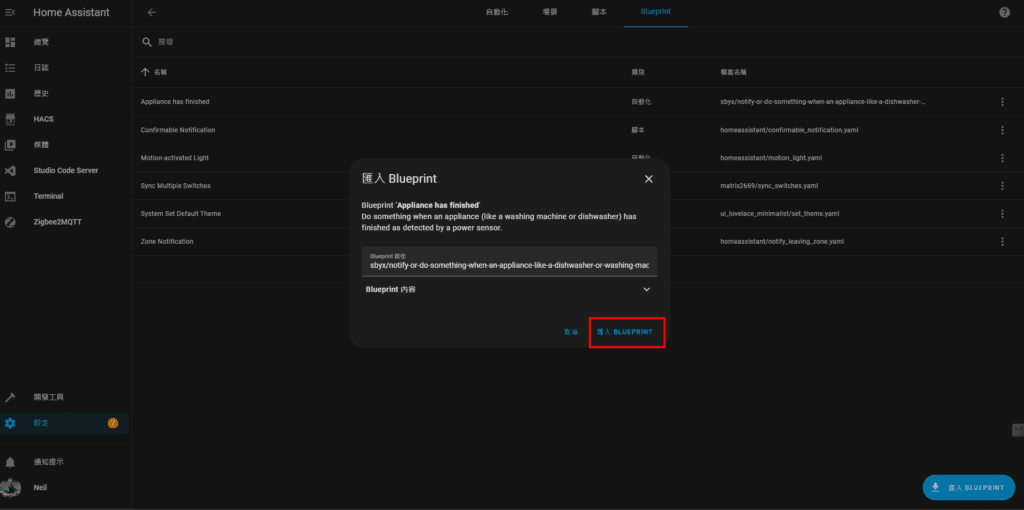
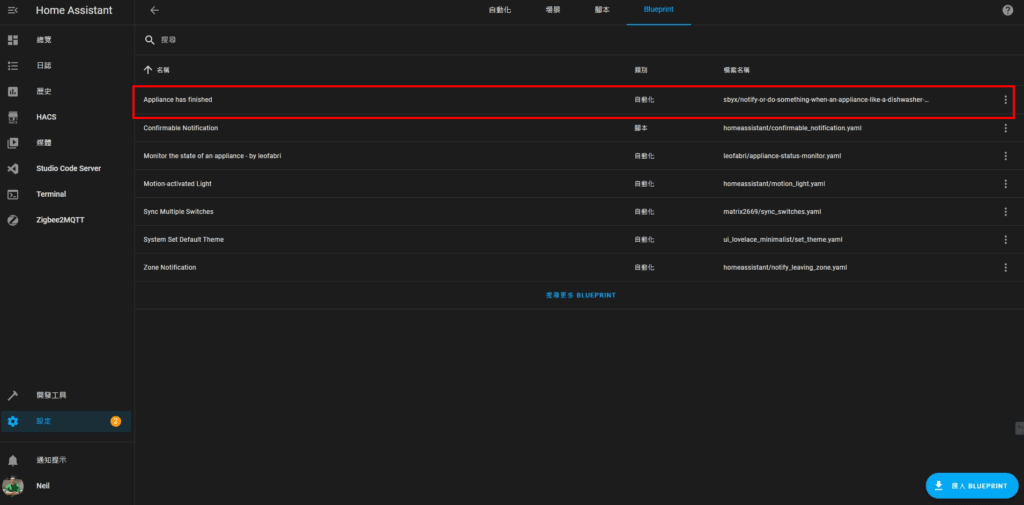
Step 1-3. Import the "Appliance has finished" Blueprint
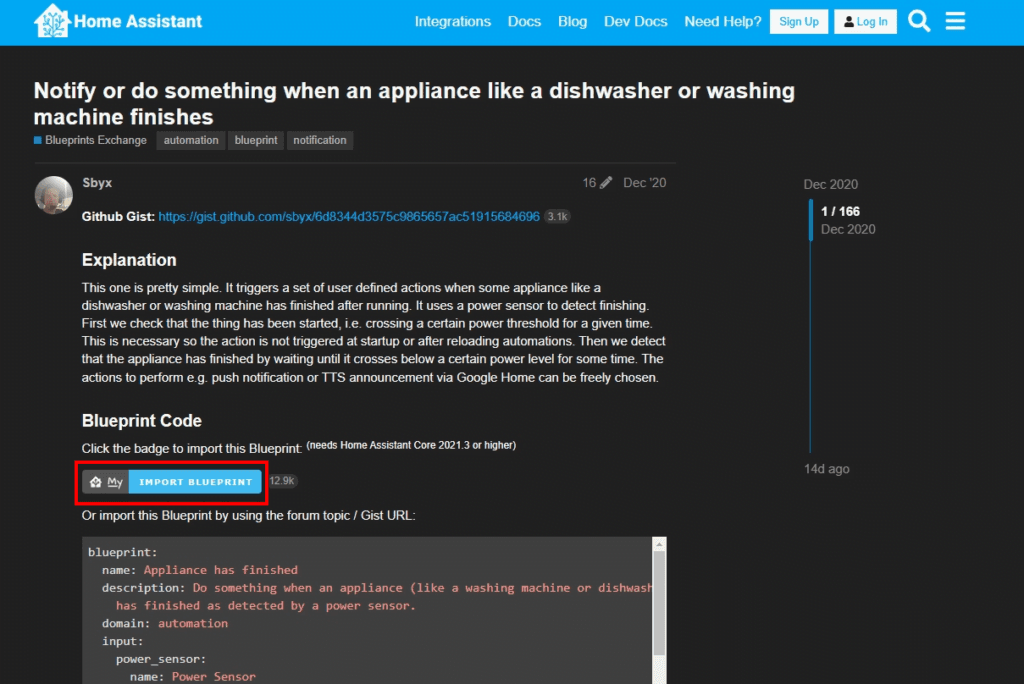
Find the "IMPORT BLUEPRINT" button in Fourm, operate it in sequence, and finally you will see the "Appliance has finished" Blueprint in the Blueprint list.

Step 2. Use the “Appliance has finished” Blueprint for automated settings
If you don’t know how to enter this automatic setting list screen, you can refer to the previous article:https://neiltw.com/home-assistant-automation-setup-guide/
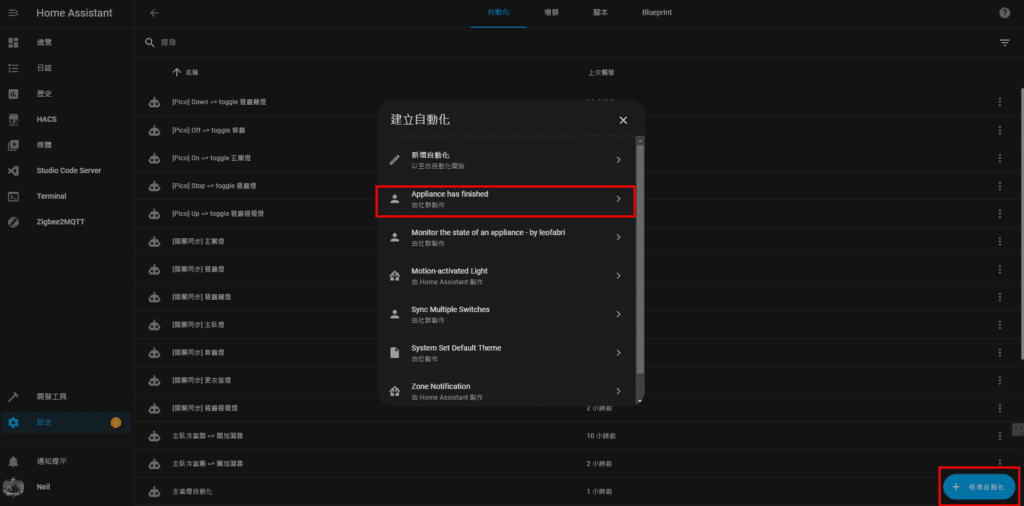
Step 2-1. Click "Add Automation" ➜ Select "Appliance has finished"
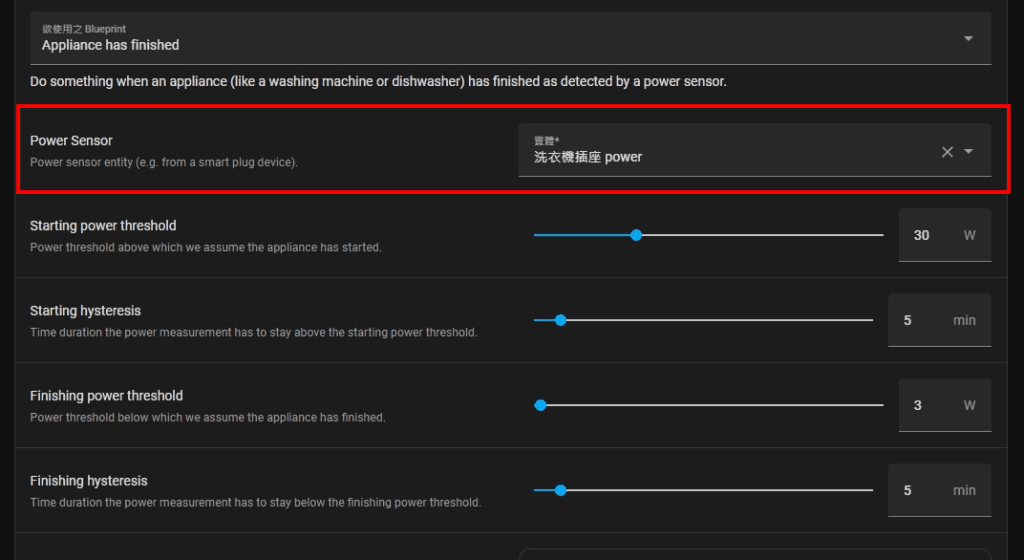
Step 2-2. Set “Power Sensor”
Select the device used to monitor the power consumption of the washing machine in "Power Sensor"
Step 2-2. Monitoring value setting
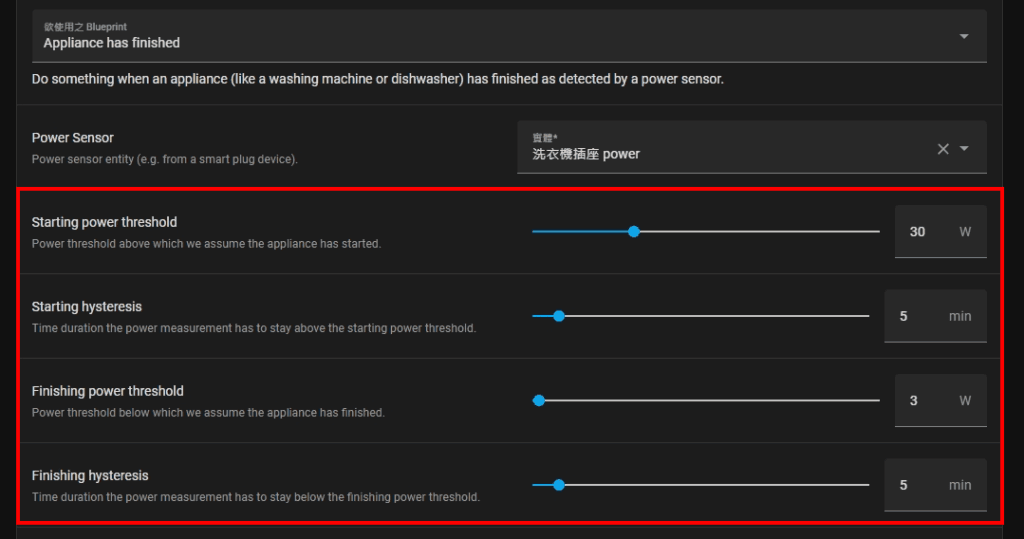
- Starting power threshold: The power threshold above which the device is assumed to be started. My setting here is 30 W
- Starting hysteresis: How long does it take for the power to exceed the threshold before it is really started? My setting is 5 minutes
- Finishing power threshold: If the power threshold is below this threshold, the device is assumed to have finished. I set 3 W
- Finishing hysteresis: How long does it take for the power to be below the threshold before it is truly finished? I set 5 minutes
The above values can be adjusted depending on the situation. The above settings are the settings I am currently trying to best suit our home.
Step 2-3. Action when setting is completed
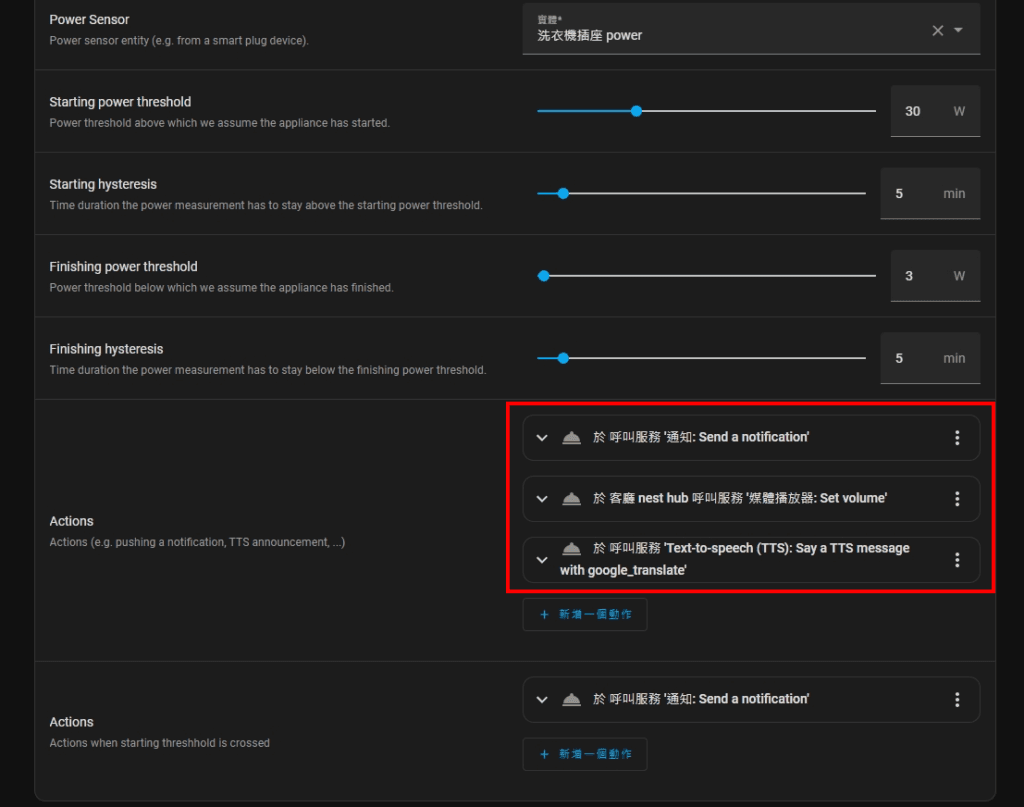
Here I have set three actions:
- "Notification: Send a notification": Send push notifications to family members' mobile phones.
- "Media Player: Set volume": Set the volume of the smart speaker that will play the voice notification next (to avoid the original volume being too high or too low).
- "Text-to-speech(TTS): Say a TTS message with google_translate": Play voice notifications from smart speakers through the Google Assistant service.
Step 2-3-1. Set "Notification: Send a notification"
- "Service" select "Notification: Send a notification"
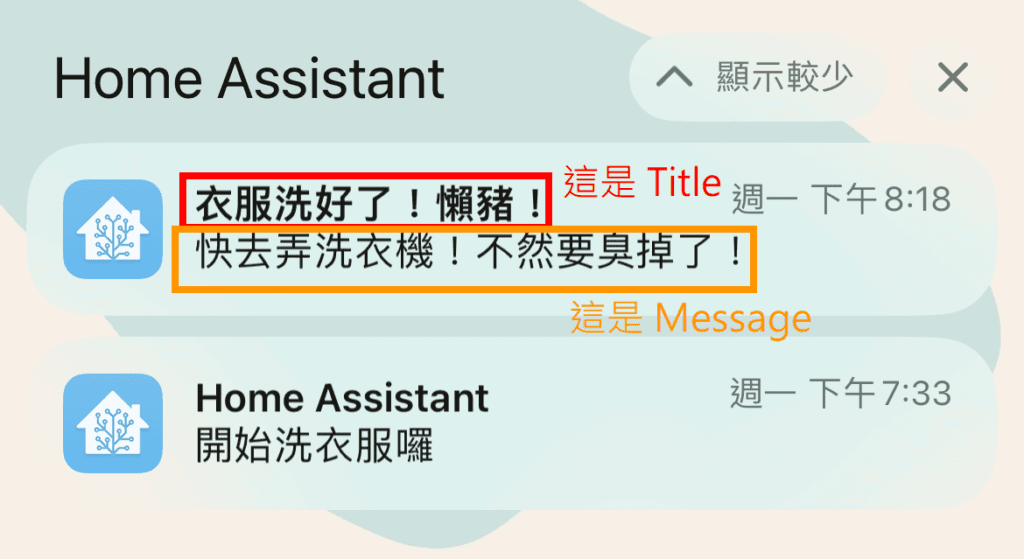
- Fill in the text you like in "Message" and "Title"

Step 2-3-2. Set "Media Player: Set volume"
- "Services" select "Media Player: Set volume"
- "Target" selects your smart speaker via device or entity
- "Level" sets the desired volume. I set it to 0.6, which is 60%.

Step 2-3-3. Set "Text-to-speech(TTS): Say a TTS message with google_translate"
- "Service" select "Text-to-speech(TTS): Say a TTS message with google_translate"
- "entity_id" select your smart speaker
- "Message" fill in the content you want to be notified by voice
- "Language" fills in the desired voice language, here I fill in "zh-tw"

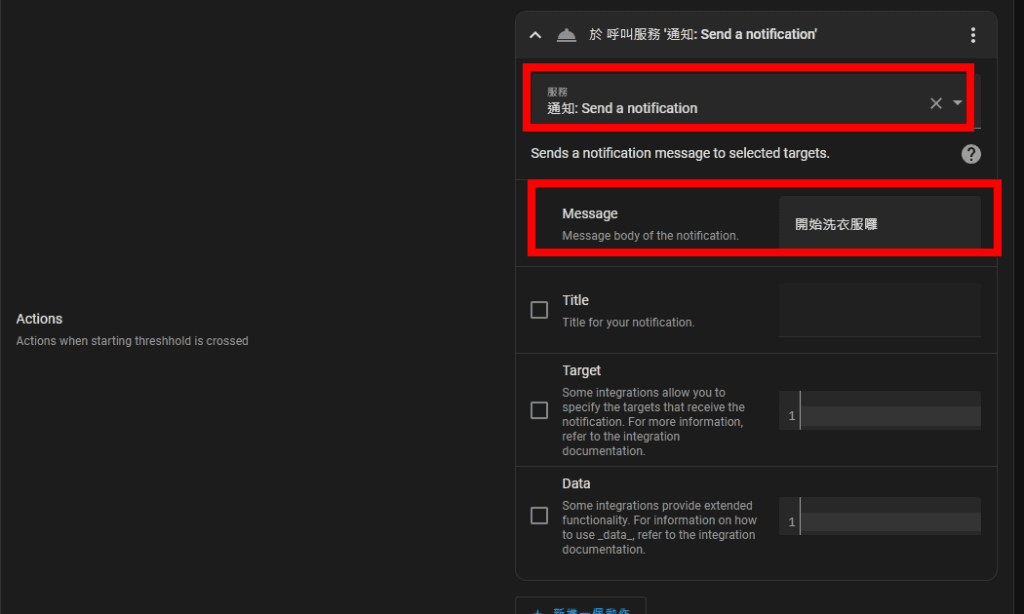
Step 2-4. Set the start action
- "Service" select "Notification: Send a notification"
- Fill in the text you like in "Message" and "Title"
The above are the steps to use Blueprint to quickly complete automation settings. From now on, you no longer have to worry about how to properly set triggers, judgment conditions, and actions. Use Blueprint to integrate your own suitable smart devices and set automation in this way ( Automation) is even easier!

Thanks for sharing!!
super practical