
Just like computers and mobile phones, Home Assistant also needs to be backed up. Whether it is upgrading or replacing a device or recovering from a system crash, it is very convenient. Although there are backup options during system updates and add-on updates, through Google Drive Backup automatic backup allows you to more easily retrieve system backups at a certain time in the past, and you can restore them at any time. It is highly recommended to set this add-on as early as possible during the initial startup of the Home Assistant system!
Table of contents
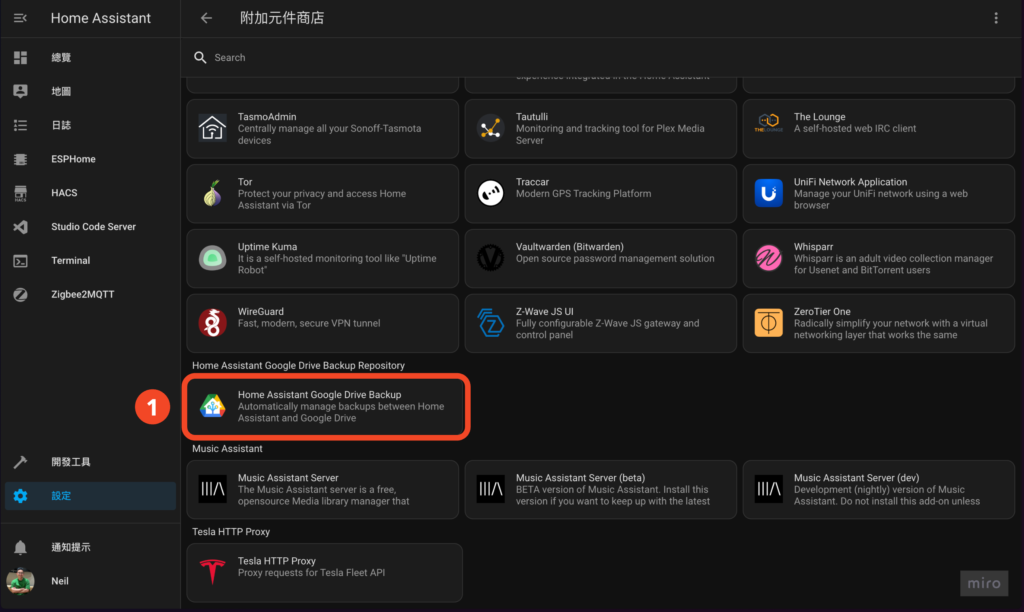
Step 1. Add-on repositories
Because Google Drive Backup is not a native built-in Add-on of Home Assistant, you need to add a new repository to install it.
- "Settings" on the left
- Click "Add-ons"
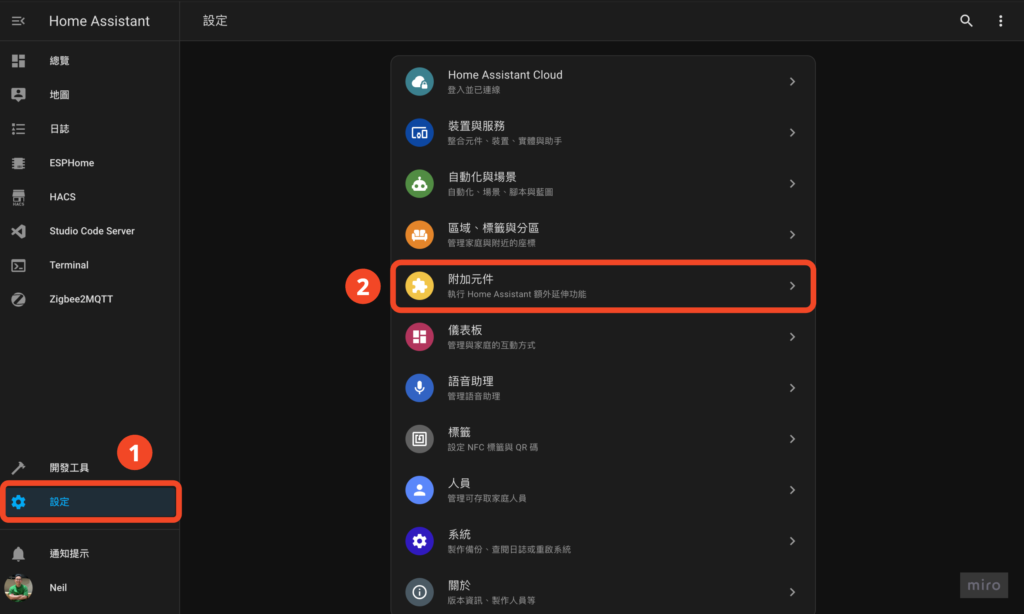
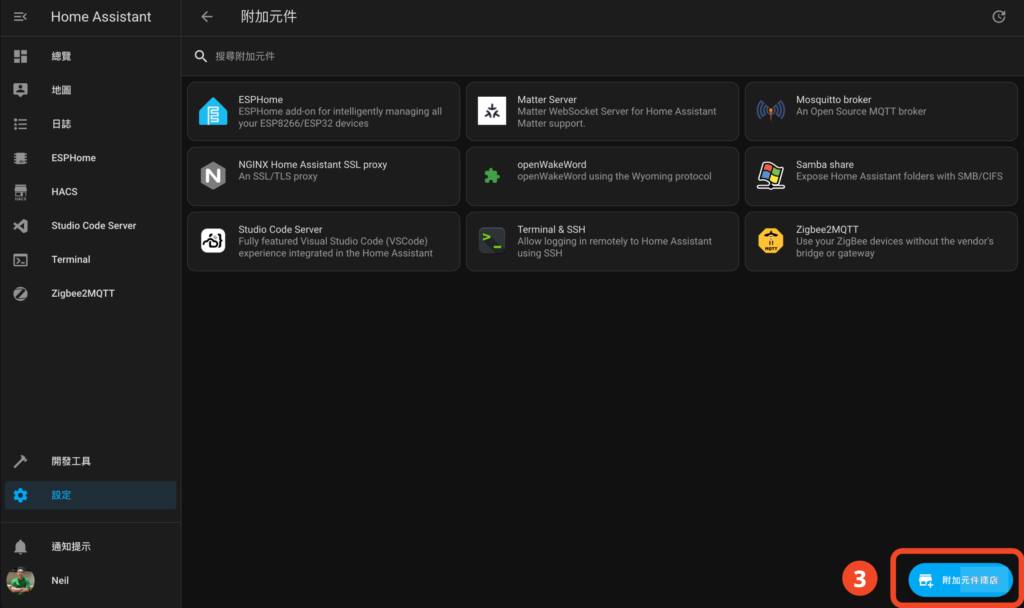
- Click "Add-on Store" in the lower right corner
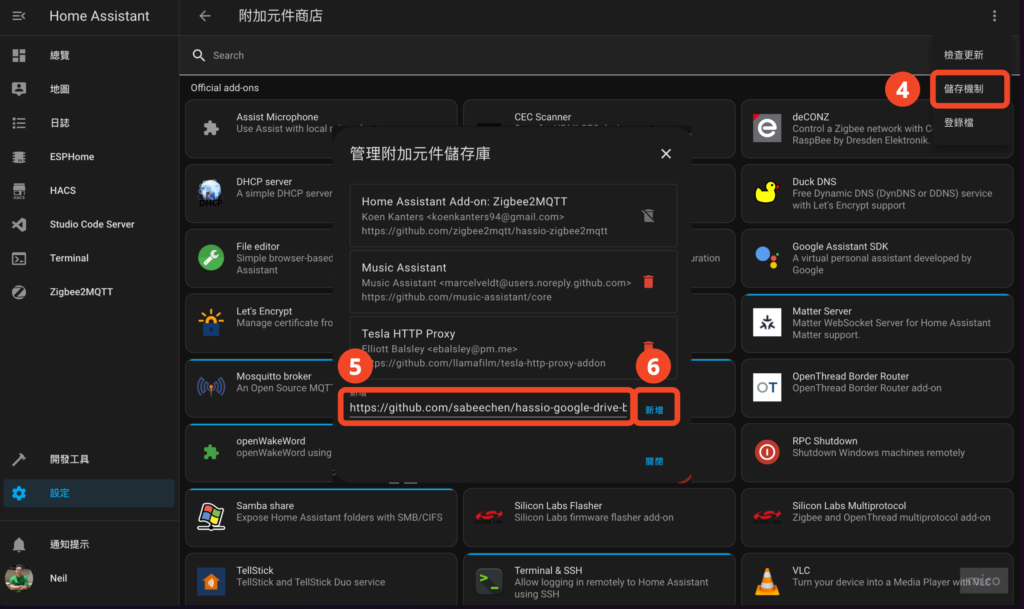
- "... > Storage Mechanism" in the upper right corner (this translation is so strange😅)
- Paste the input box with "https://github.com/sabeechen/hassio-google-drive-backup.git"
- Click "Add"
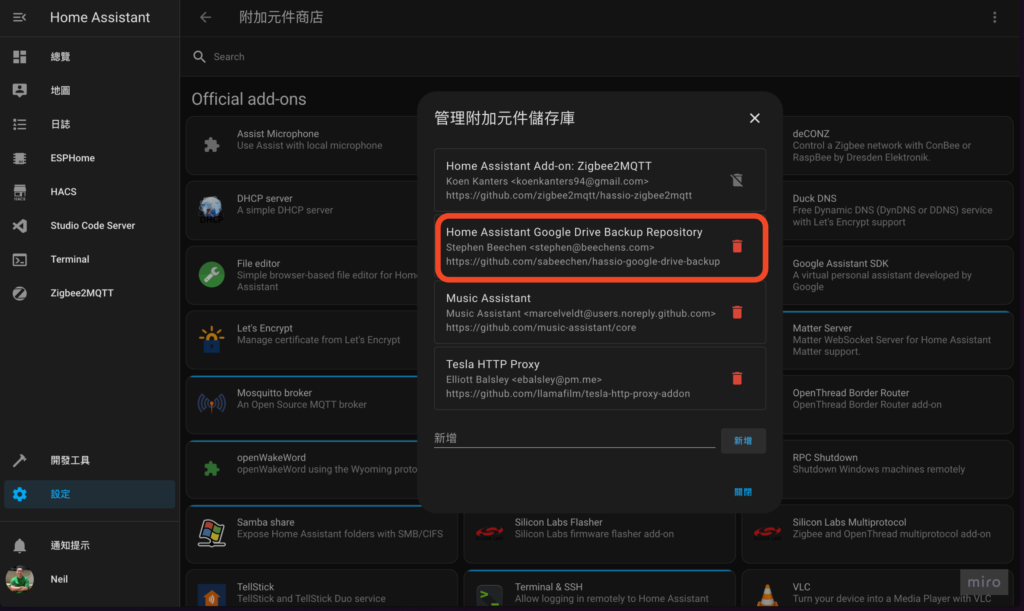
Repository addition completed!
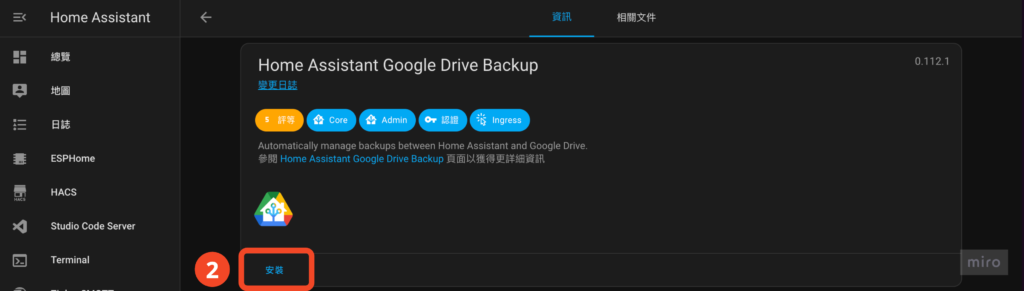
Step 2. Install Google Drive Backup Add-on
- Click "Home Assistant Google Drive Backup"
If you can't find it, just refresh the page and it should be there. If it still doesn't exist, go back to the previous step to confirm whether the repository has been added successfully.
- Click "Install"
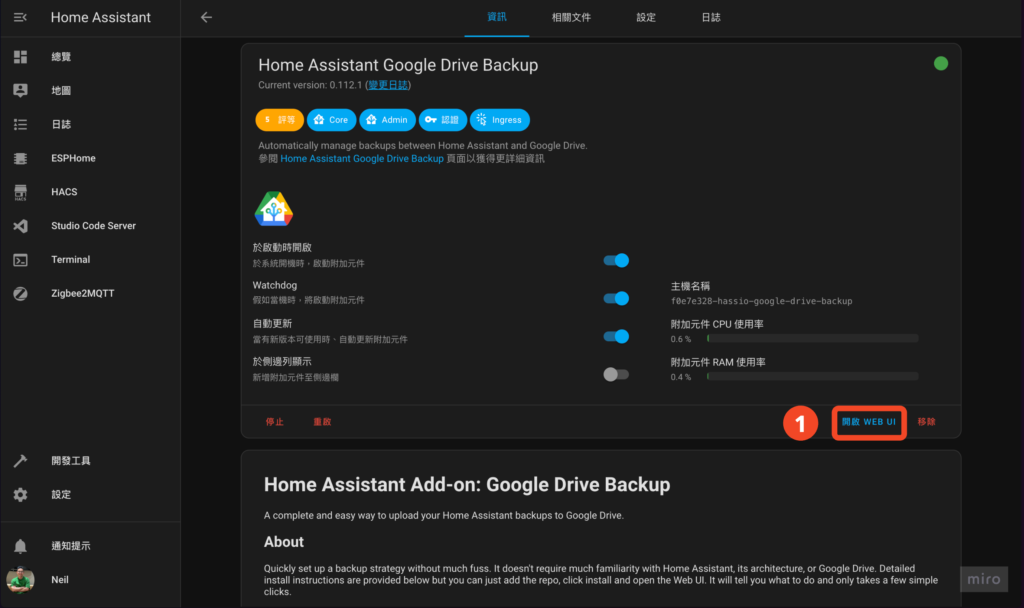
- Turn on "Watchdog" (required), "Automatic update" (optional), "Show in sidebar" (optional)
- Click "Start"

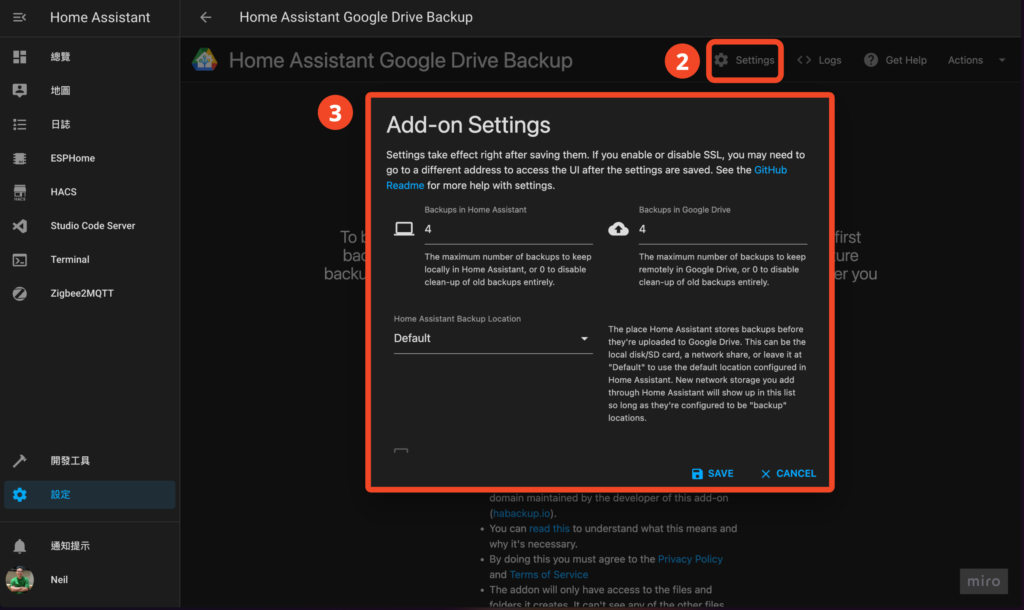
Step 3. Configure Google Drive Backup
- Click "Open WEB UI"
- Click "Setting"
- Adjust the settings. You can set them according to your needs, but there are several settings that are highly recommended:
- Password: Enhance some security. You will need to enter a password to use it when you restore it in the future, so if someone gets your backup file in a bad way, you can't use it if you don't know the password.
- Keep Generational Backups: This setting can be used to keep older versions of backup files. Here I set 3 days, 3 weeks, 3 months, 1 year. You can also set it according to your needs.
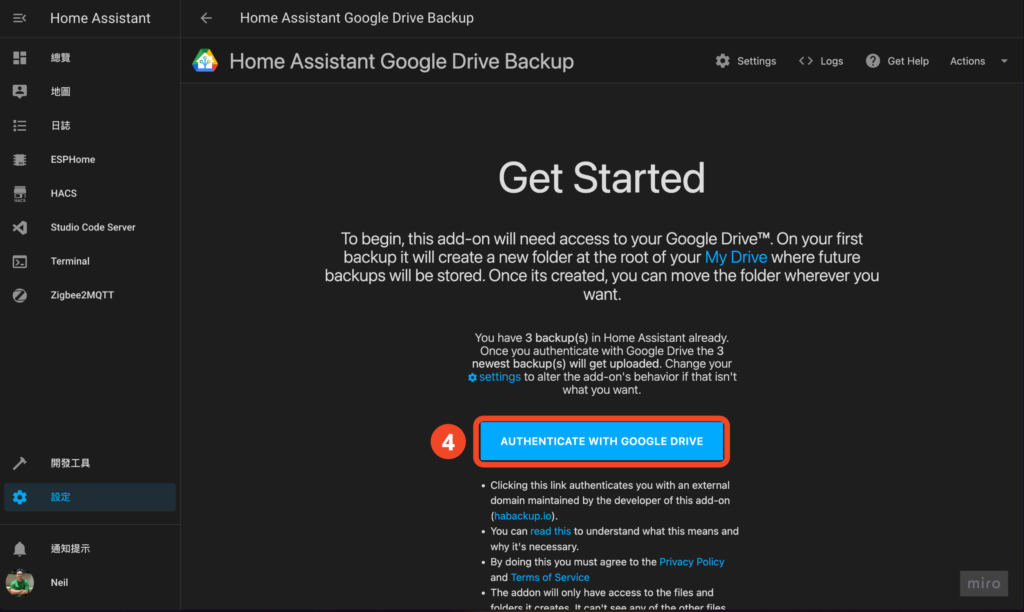
- Click "AUTHENTICATE WITH GOOGLE DRIVE"
💡In my case, each backup file is about 100mb. Different system setting complexity may produce backup files of different sizes. It is recommended that you refer to the capacity of your Google Drive to consider whether to open another Google account specifically for backup.
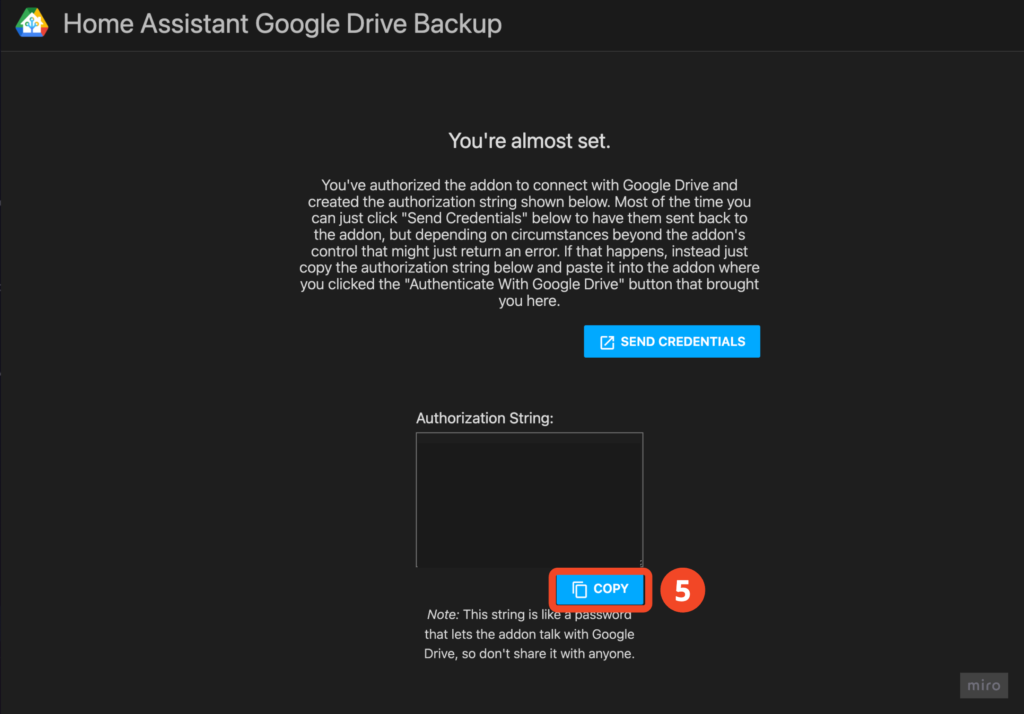
- After logging in, you will get a bunch of keys, click "COPY"
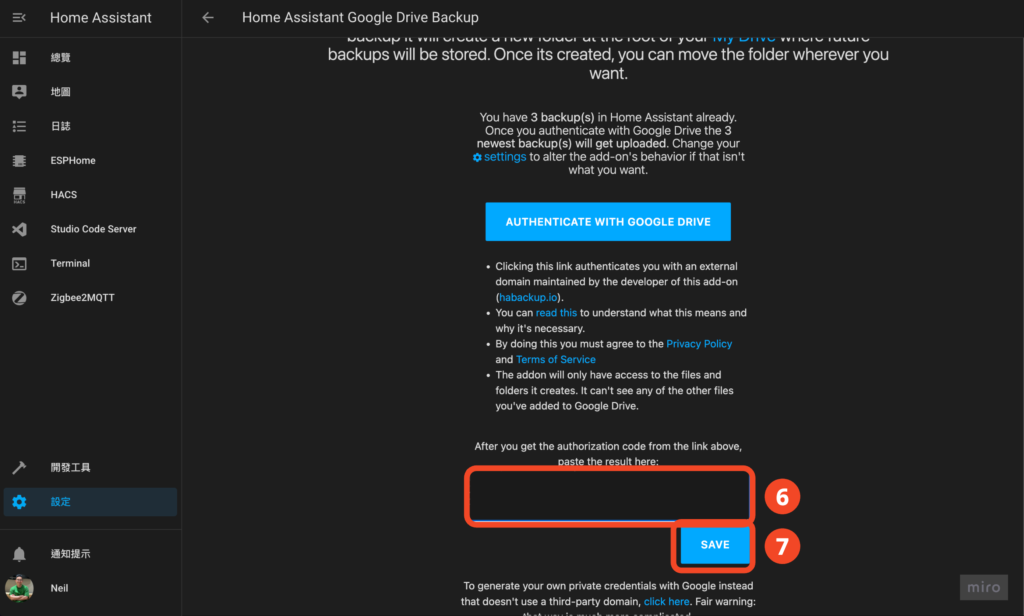
- Return to the previous screen and paste the key in the input box below
- Click "SAVE"
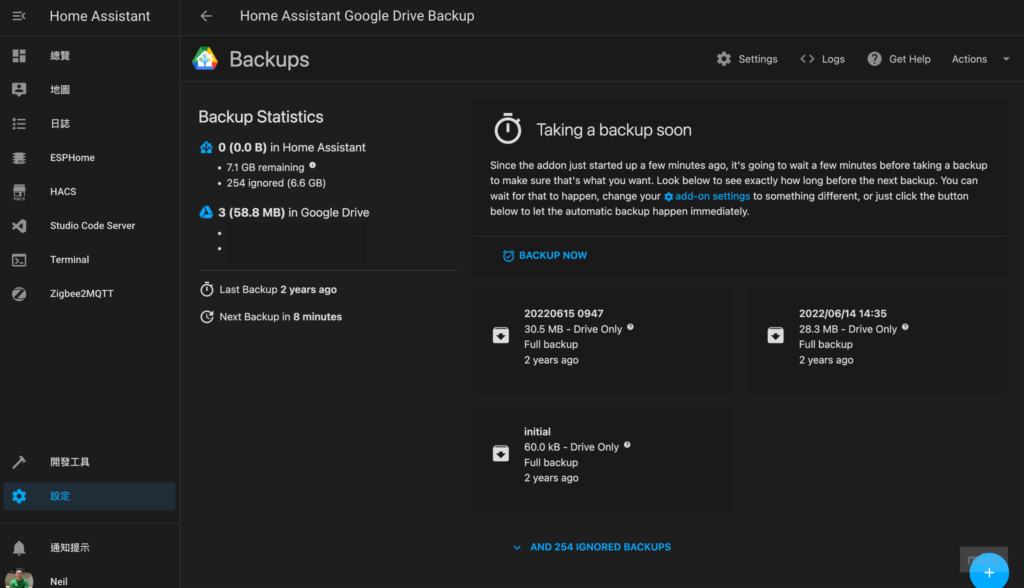
You're done!
When you finally see this picture, it’s a success! I have been using HA for two years without backing up. I really admire my own luck🤣 You must not imitate this!
I’ve seen too many people cry without tears after HA crashed because they didn’t back up HA. I was really too lazy before🤣
Thanks to Neil for sharing and teaching. I successfully installed it today, but I still don’t understand many settings. I need to read more articles.
This article is so useful. Thanks to Neil for his recent quick output😂😂😂
Hi M, thanks for the encouragement, I hope it helps you! It was discovered that I have posted more frequently recently🤣