Although I am personally more accustomed to using floor plan control, setting up the floor plan Dashboard is difficult, and it is not easy for novice programmers to get started. Today I will introduce how to use Home Assistant without relying on any plug-ins and without touching YAML coding. Build the most basic Dashboard!
If you are interested in floor plan Dashboard, please refer to this article directly:
Table of contents
Let’s take a look at the final product first
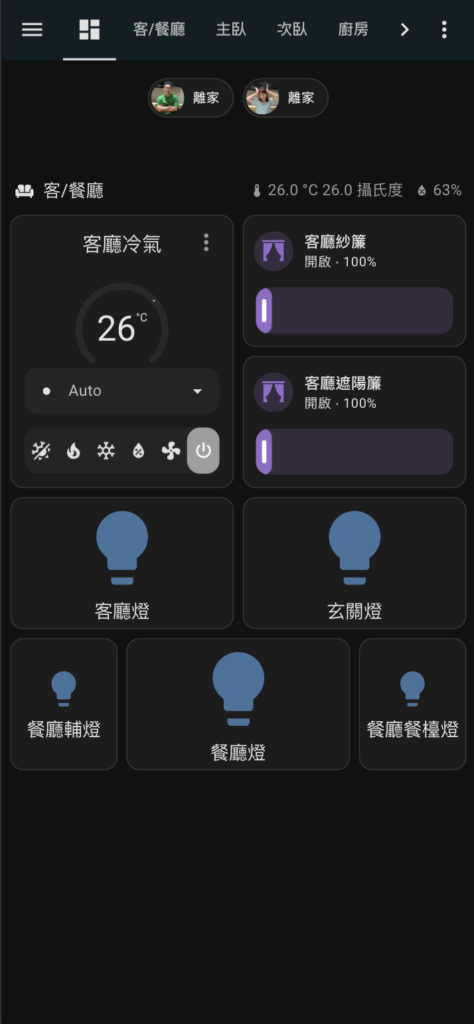
Do some basic goal setting before you get started:
- Because controlling through mobile APP is the most frequent and convenient usage scenario of Dashboard, the settings introduced today will give priority to mobile operation.
- Today we will set up the Dashboard in the most common "area segmentation" method. You can adjust it according to your own usage habits in the future.
- Today we will use the most common types of devices: air conditioners, switches, and curtains. If you have other types of devices in your home, you can add more according to your needs.
Step 1. Add a new canvas
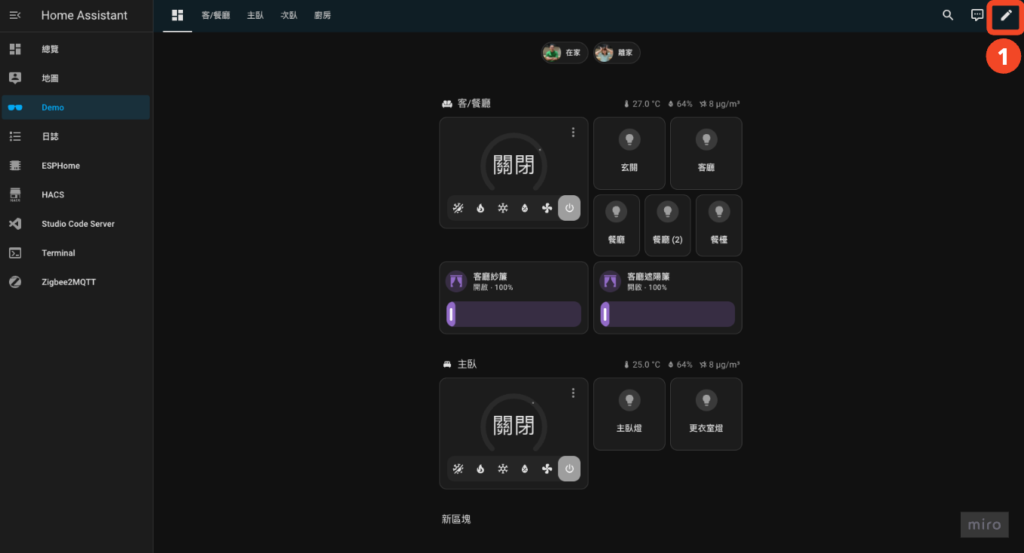
- Find your dashboard and click on the pencil icon in the upper right to enter edit mode.
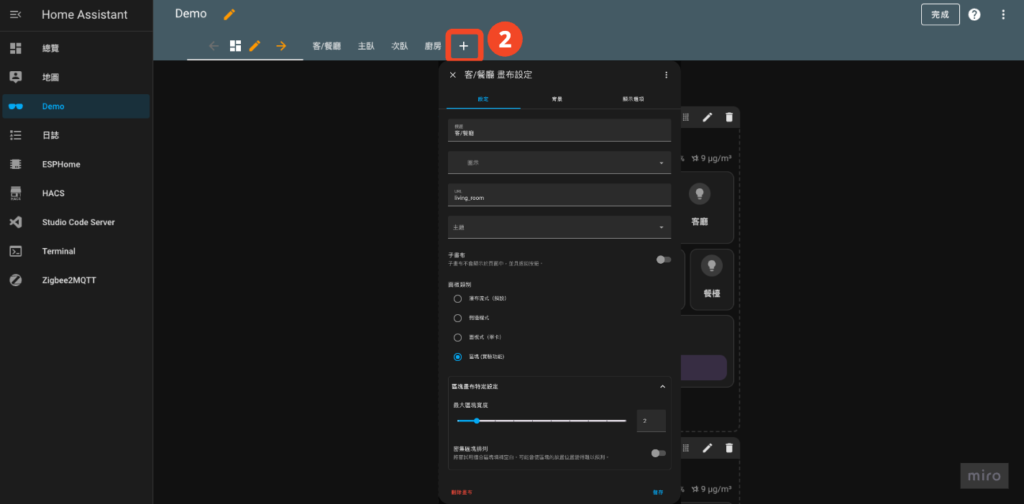
- Click "+" and enter canvas information
- Title: The text displayed on the canvas switching tab on the screen (the ones to the left of the "+"), as short as possible for easy recognition
- Icon: After selecting the icon, only the icon will be displayed on the tab, which can make the entire screen more concise, but you must pay attention to whether the icon can help accurately identify the content of the tab. In today’s demo, I chose the overview part Use pictures, and use text titles directly for other canvases.
- URL: This is only used in more advanced applications. Here, just enter the English name corresponding to the canvas.
- Theme: It will only be used if you install another theme, you can ignore it first.
- Sub-canvas: It is also used by more advanced applications.
- Panel type: Select "Block" today
- Maximum block width: This refers to the maximum number of blocks that can be accommodated in a row. The default is 4 and the setting is 2. I personally think it is more suitable. Of course, if your screen is wider or you commonly use desktop or tablet controls, You can also increase the value.
In fact, after the canvas is set up, you can freely play it. However, since some friends may have no idea about setting up a smart home Dashboard, let’s introduce some basic settings😎
Step 2. Set physical seal
Except for the "Panel" type canvas, there is a "Physical Chapter" block at the beginning of the canvas by default.
"Entity stamp" allows you to quickly check the status of the entity, and at the same time, you can quickly operate the entity (eg turn off all lights). The most basic application is to display the status of family members at home and away from home.
- Click the "+" in the capsule shape at the top of the canvas
- Select "Entity"
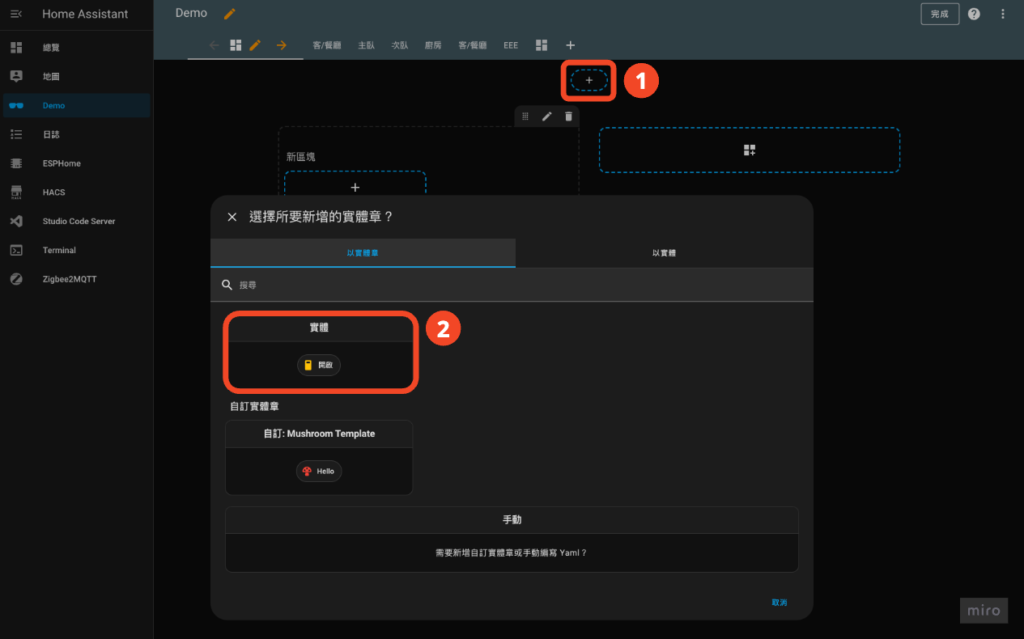
- Select the corresponding personnel entity
- Turn on "Show physical photos" (you can also turn it off, but I think it looks better to show avatars)
- Click "Save"

After setting up all the family members, you can see everyone’s status at home and away from home on the screen! Click to also see a map of the member's last location.

Step 3. Set section title
- Click the "+" in the block
- Select "Title"

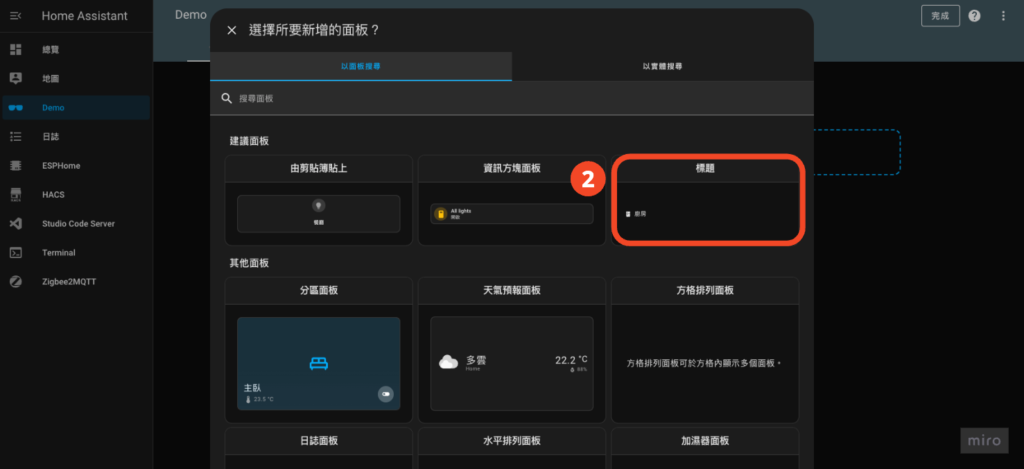
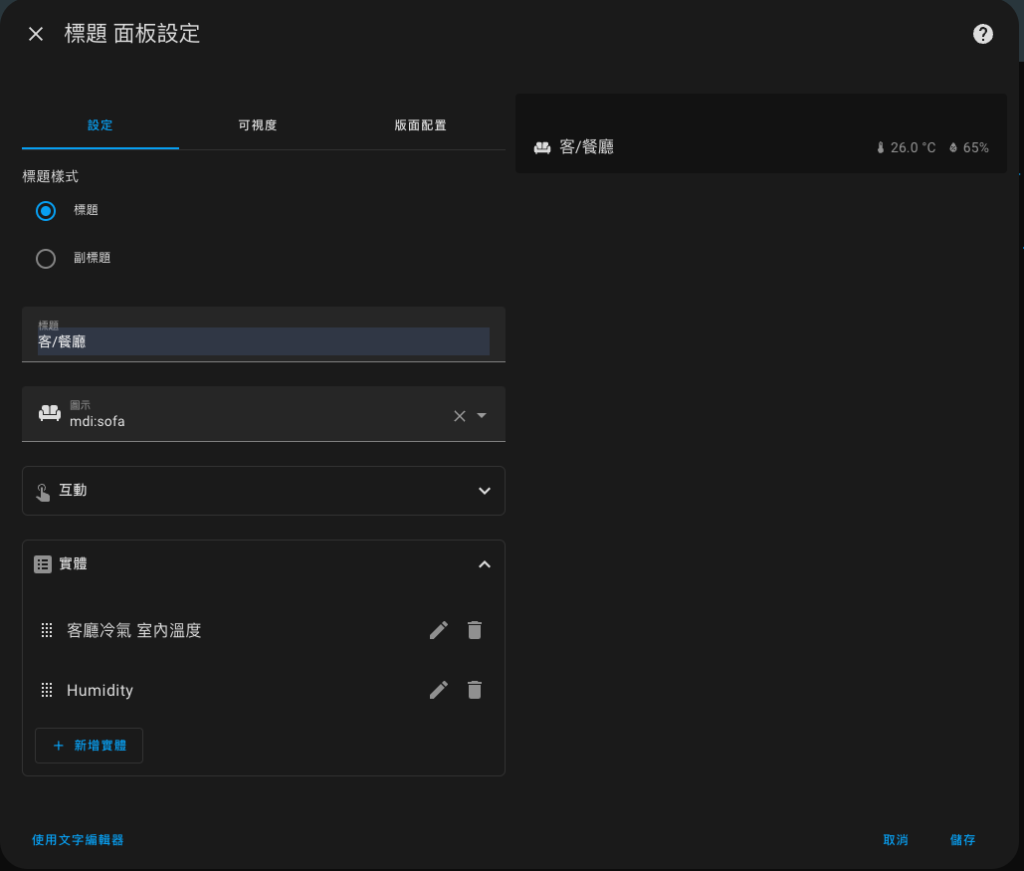
- Set "Title"
- Title: Set your name for this partition.
- Illustration (optional): Select an appropriate icon to represent this room (or section).
- Entity: This is Home Assistant 2024.10 The new function can display the status of the entity on the right side of the title card. Here I have selected indoor temperature and humidity. You can also try to select other statuses you want to display.
Step 4. Set the thermostat panel (air conditioner)
- Click the "+" in the block
- Select "Thermostat Panel"

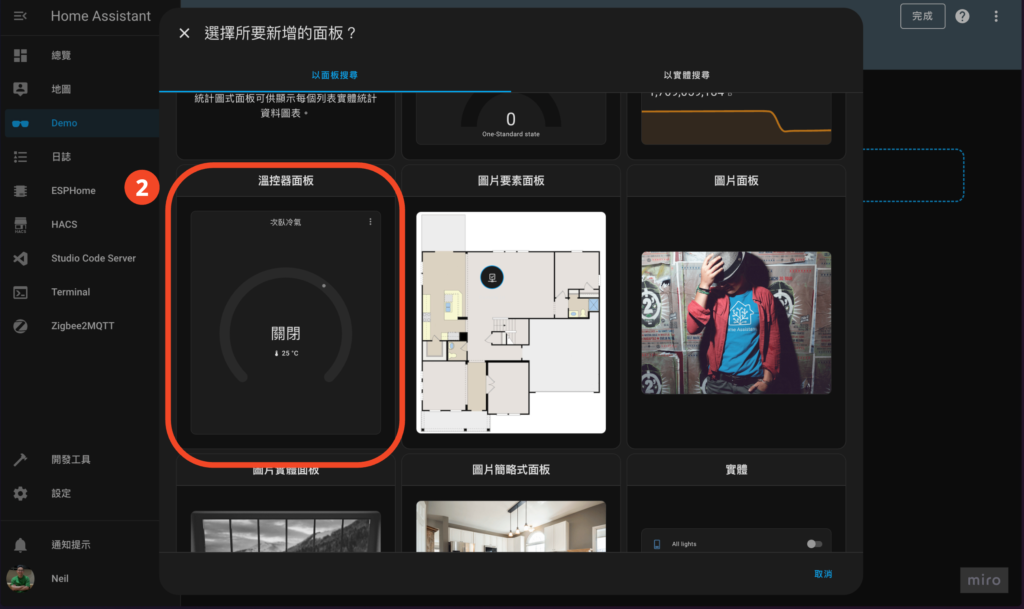
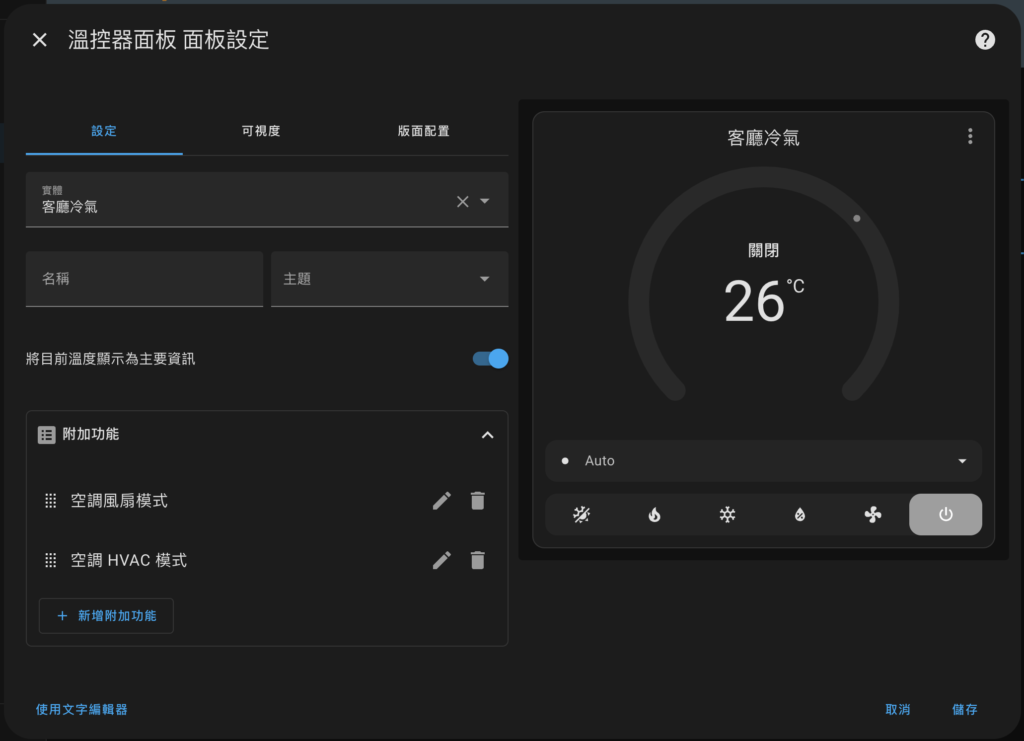
- Set up "Thermostat Panel"
- Entity: Select the air-conditioning entity of the corresponding area.
- Name: Set the name displayed on the interface. If there is no input, the entity name will be used directly.
- Additional functions: I choose "Fan Mode" and "HVAC Mode" here. Different brands and different integration methods may have different functions. You can choose the function according to your own situation and needs.
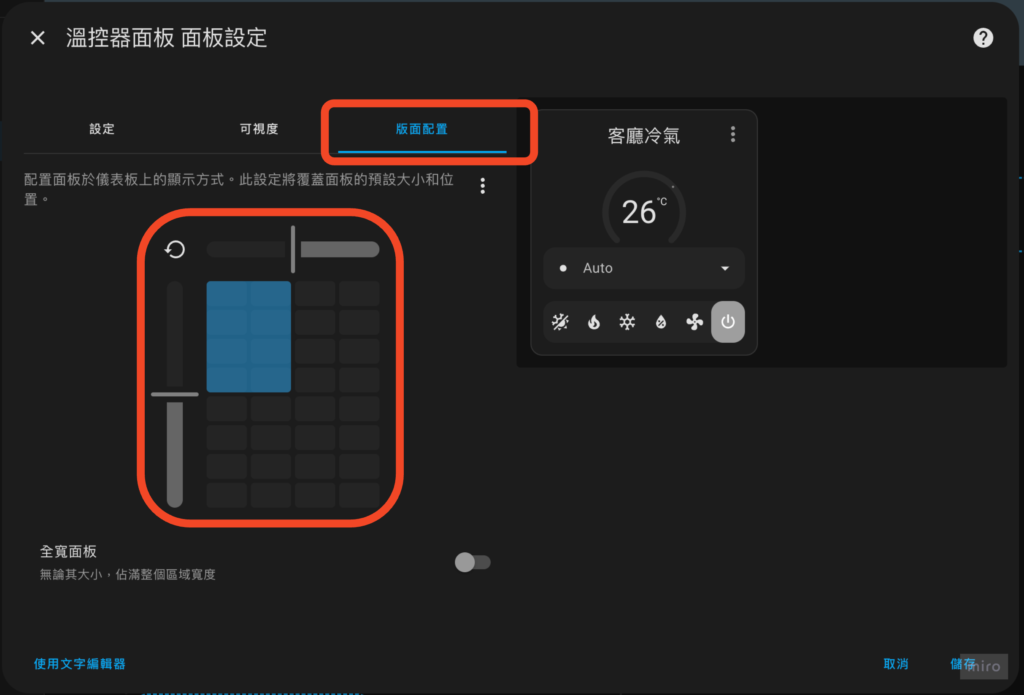
- Adjust the "Layout Configuration": In order to make the final Dashboard more compact, I chose to shrink the thermostat panel a bit, which can be adjusted according to your own preferences.
Step 5. Set up curtain card
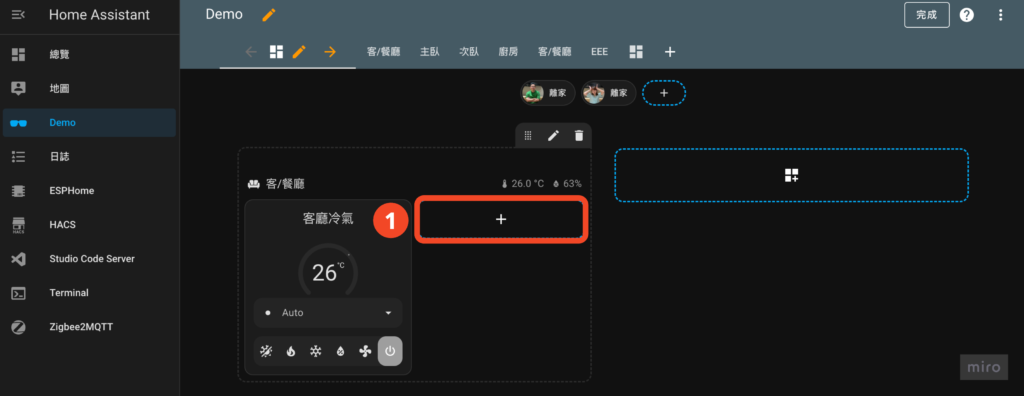
- Click the "+" in the block
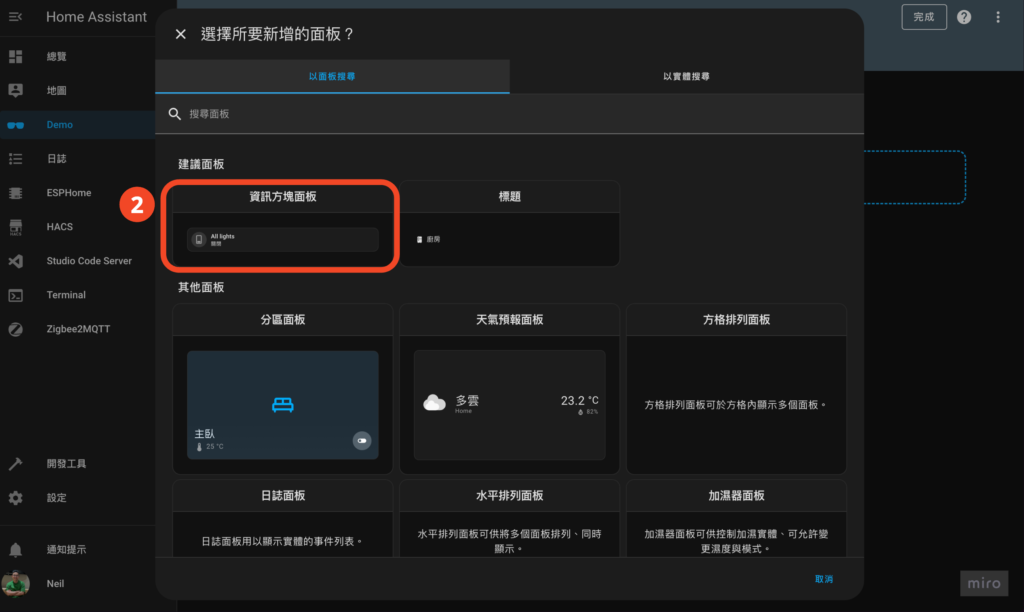
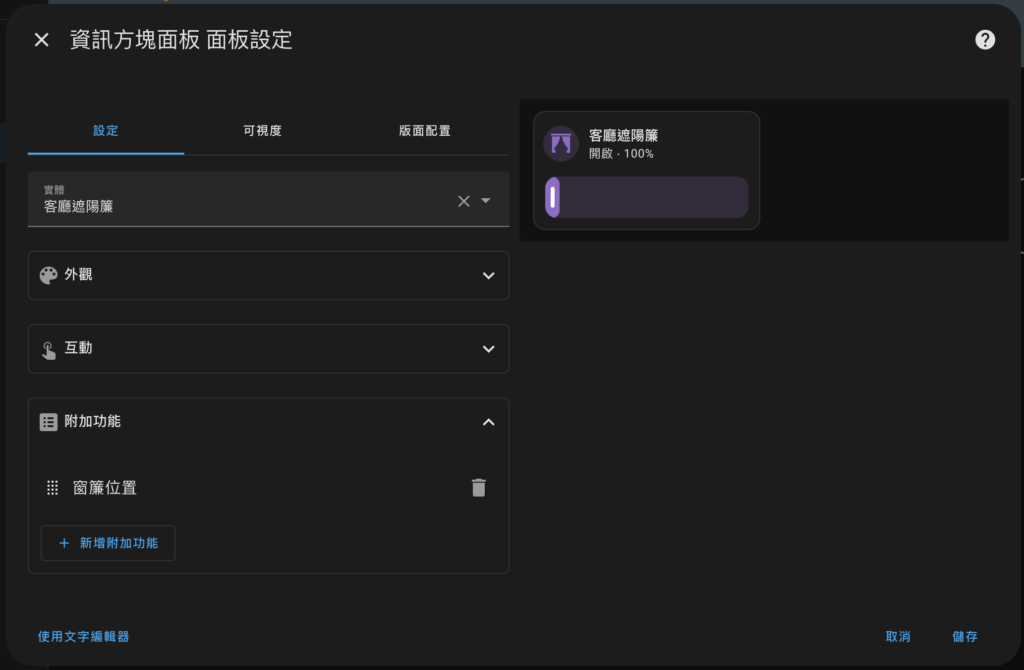
- Select "Information Block Panel"
- Set up the "Information Block Panel"
- Entity: Select the curtain entity in the corresponding area.
- Appearance: The display name and icon can be customized and selected according to personal needs.
- Additional functions: Here I choose the most commonly used "curtain position".
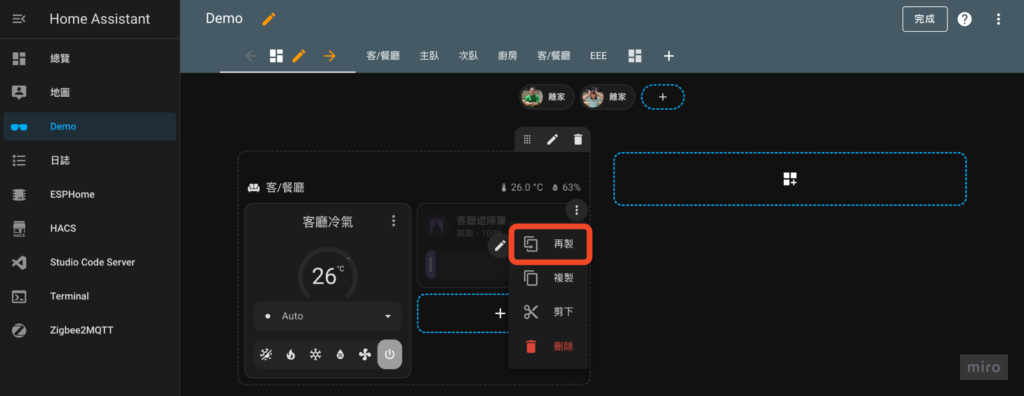
💡 You can use the "reproduction" function to quickly create similar physical cards
Step 6. Set the switch card
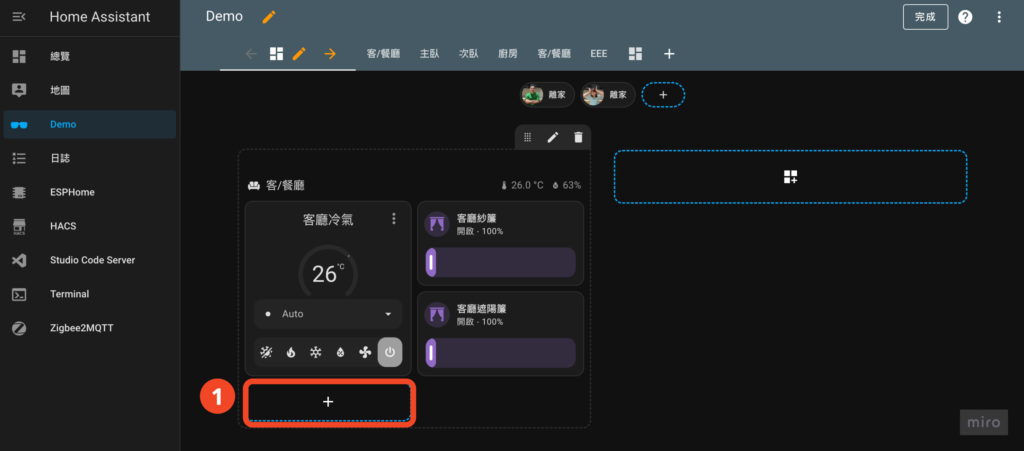
- Click the "+" in the block
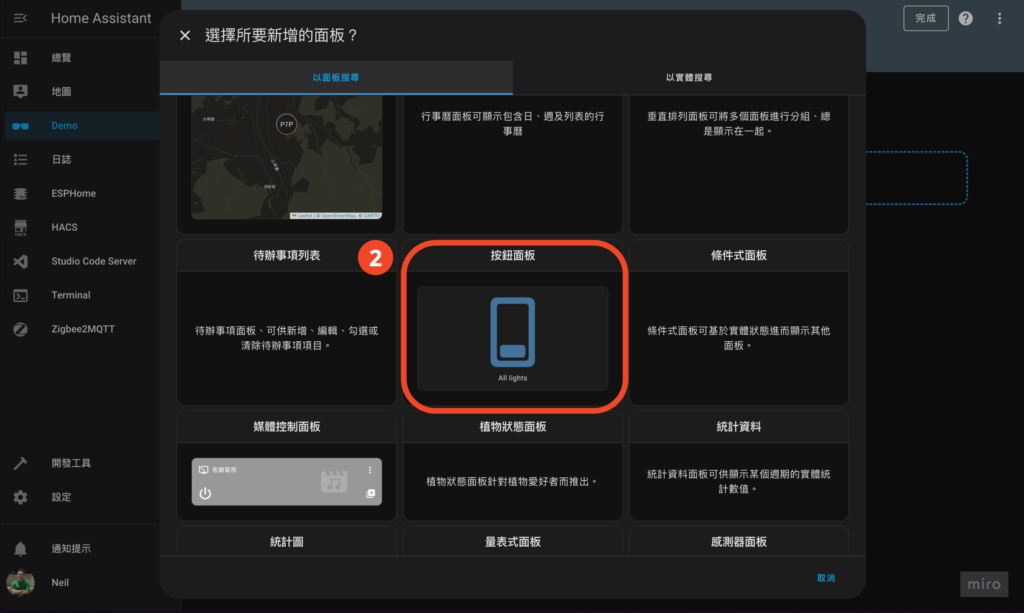
- Select "Button Panel"
- Set up "Control Panel"
- Entity: Select the entity to control.
- Name: If left blank, the entity name will be displayed directly.
- Illustration: If not selected, the original icon of the entity will be used.
- Layout configuration: Adjust according to the desired configuration.
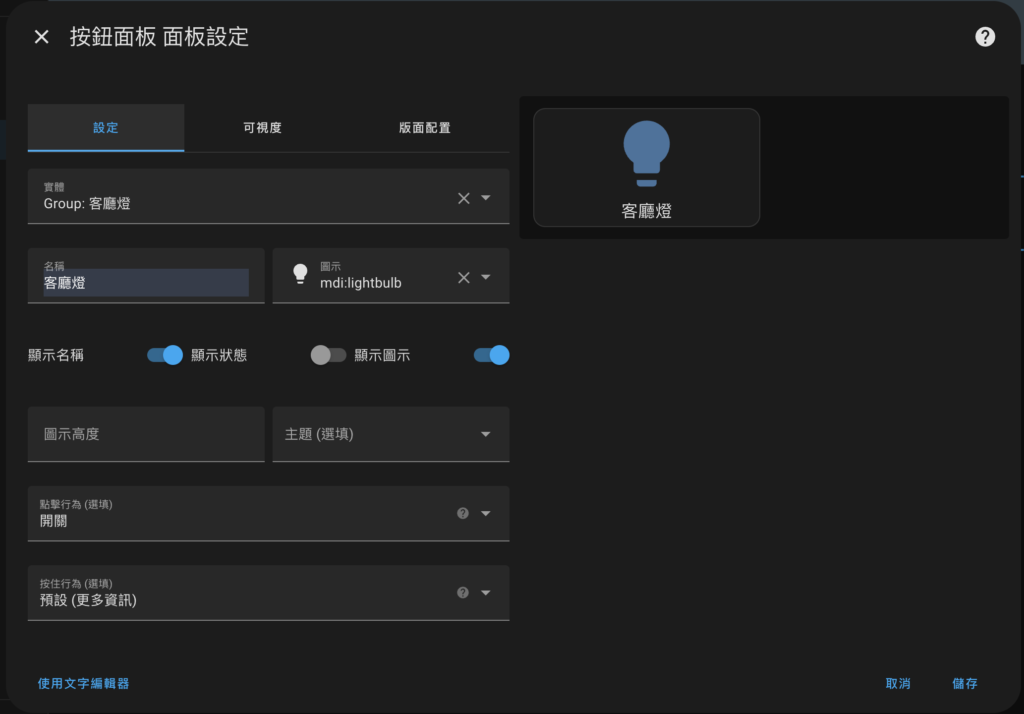
You're done!
Then follow the same steps to complete the settings for each area, and the most basic Dashboard of Home Assistant is completed! Getting started with Home Assistant is so simple. You can complete a simple Dashboard without installing additional plug-ins or writing YAML.
In the future, you can gradually enhance your own Dashboard depending on the usage conditions, and make Home Assistant something that suits you!

Neil, will you teach me how to connect the home assistant device to the external network in the future? Because setting up after crawling the article has always failed😓
Hi Hsu,
Please wait patiently~ I originally wanted to use DuckDNS, but it seems that DuckNDS will have various problems. I am trying the Cloudflare solution.
Hi Neil brother,
The above panel should be supported by the new version of HA.
Are you keeping up with the latest version?
The official demo Dashboard is quite nice.
I can also give you a reference and trial XD
https://demo.home-assistant.io/
Hi Mark, yes, I will click on the update when I see it🤣