上一篇透過一個簡單的範例教大家如何在 Home Assistant 中進行自動化 (Automation) 設定,今天會用「洗衣機洗好的時候通知」這個自動化設定來介紹如何使用 Blueprint 功能快速完成自動化設定,讓你不用再煩惱怎麼設定觸發 Trigger、判斷條件 Condition、動作 Action!(懶還要再更懶!🤣) 同時再搭配 Google Assistant 達成語音提醒的效果!
目錄
先來認識 Blueprint
Blueprint 是自動化設定範本,Home Assistant 官方有推出少部分 Blueprint,但更多的事 Home Assistant 社群網友們的分享,你可以透過這些大家分享的 Blueprint 快速完成屬於自己的自動化設定。
Home Assistant Blueprint Fourm:https://community.home-assistant.io/c/blueprints-exchange/53
在這裡你可以找到各式各樣的 Blueprint,經過大家的努力,應該各種你想得到的自動化設定 Blueprint 這裡都有!
Step 1. 匯入「Appliance has finished」Blueprint
今天「洗衣機洗好的時候通知」這個範例,我們會用到「Appliance has finished」這個 Blueprint。
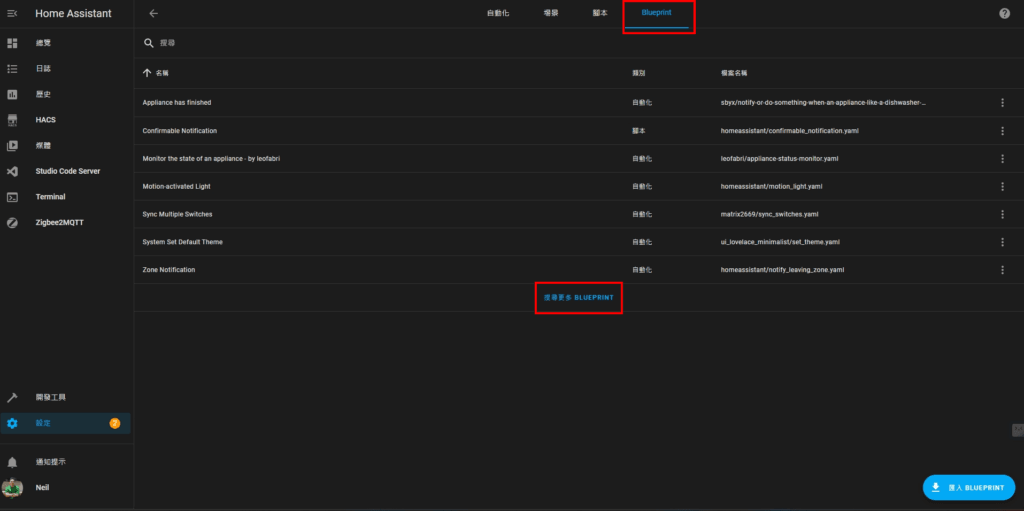
Step 1-1. 「設定」➜「自動化與場景」➜「Blueprint」➜「搜尋更多 Blueprint」
這時候會連結到 Blueprint Exchange Forum
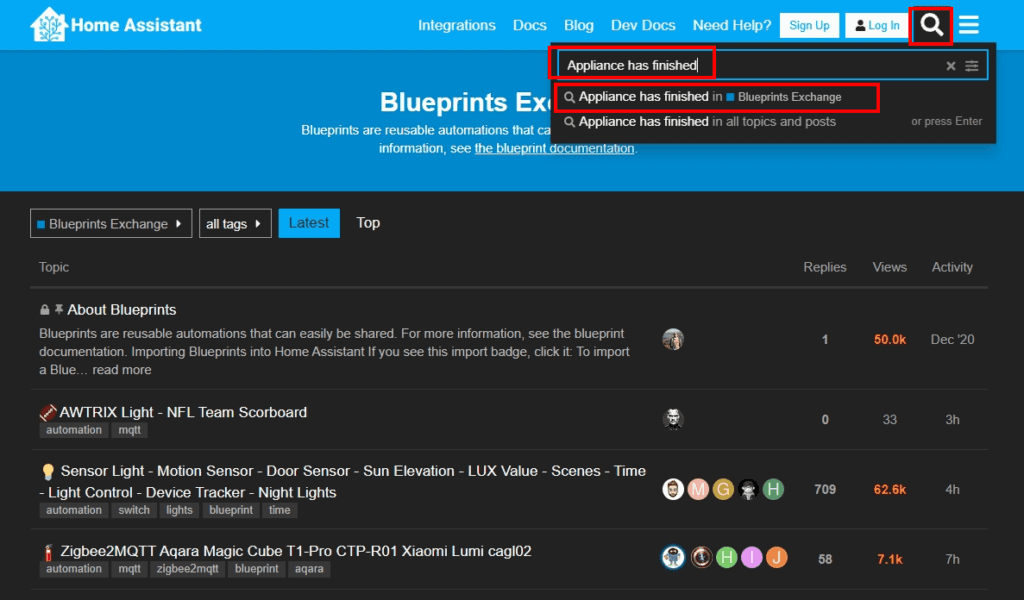
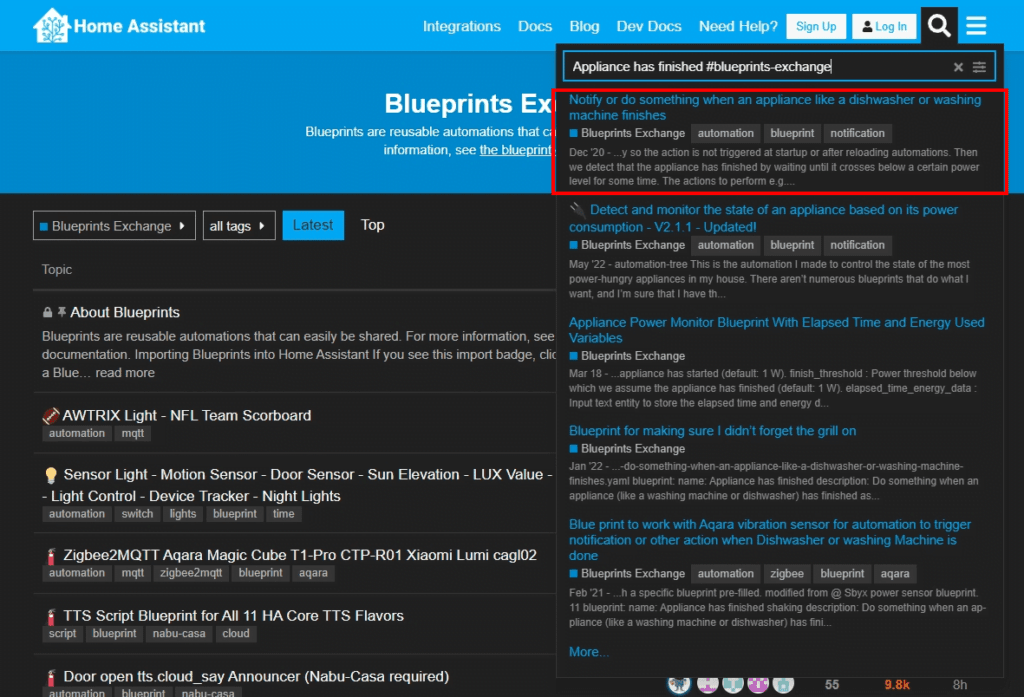
Step 1-2. 找到「Appliance has finished」Blueprint
- 在 Blueprint Exchange Forum 搜尋輸入框中輸入「Appliance has finished」
- 選擇「Appliance has finished in Blueprint Exchange」
- 選擇第一篇「Notify or do something when an appliance like a dishwasher or washing machine finishes」,或直接進入這個連結:https://community.home-assistant.io/t/notify-or-do-something-when-an-appliance-like-a-dishwasher-or-washing-machine-finishes/254841
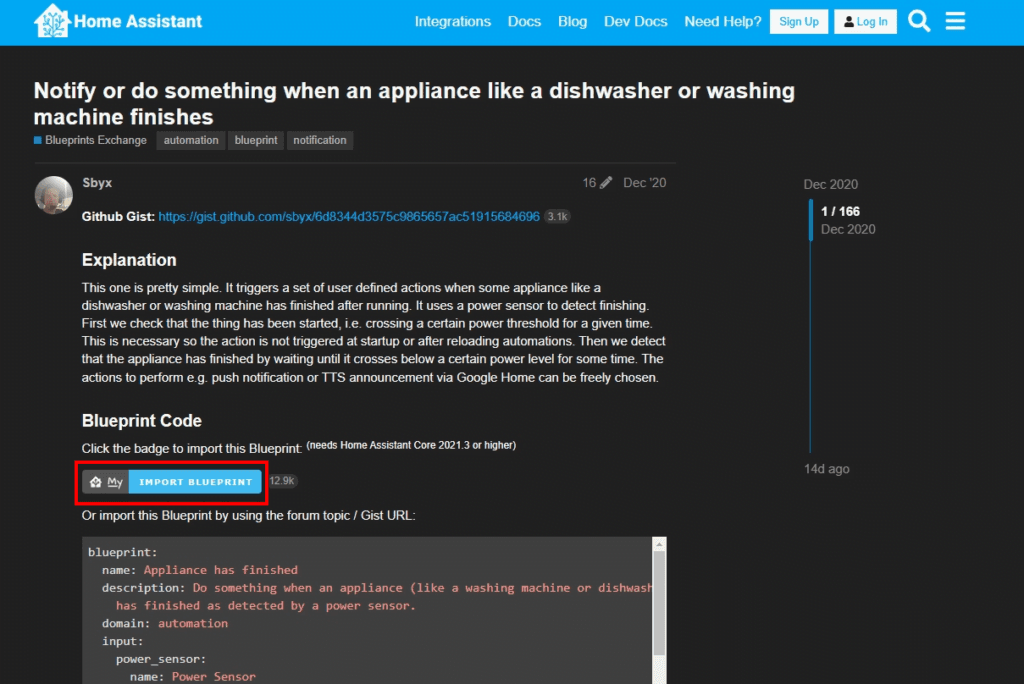
Step 1-3. 匯入「Appliance has finished」Blueprint
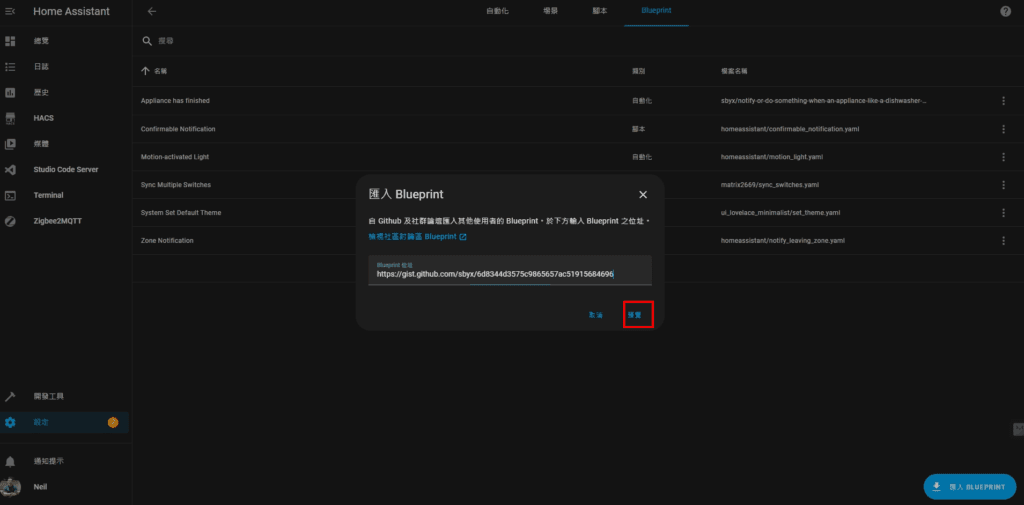
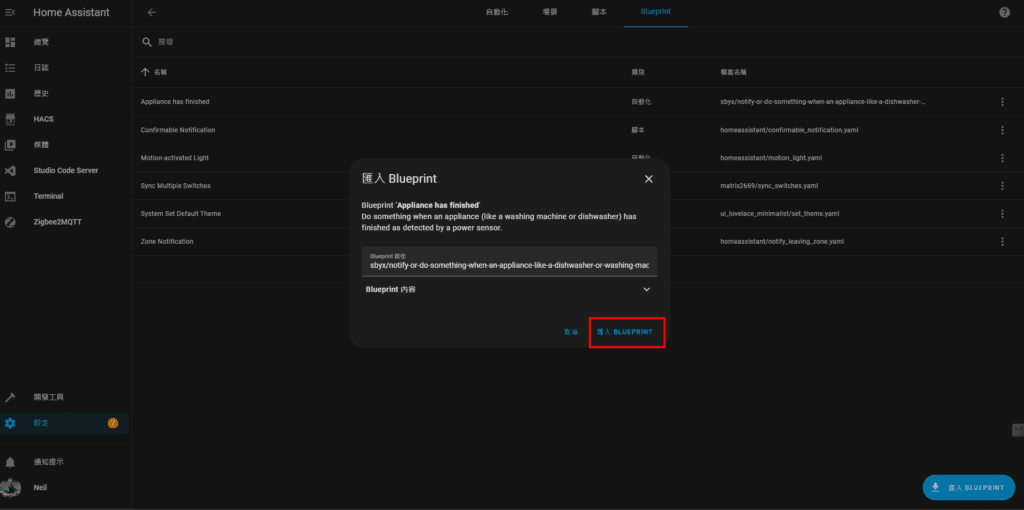
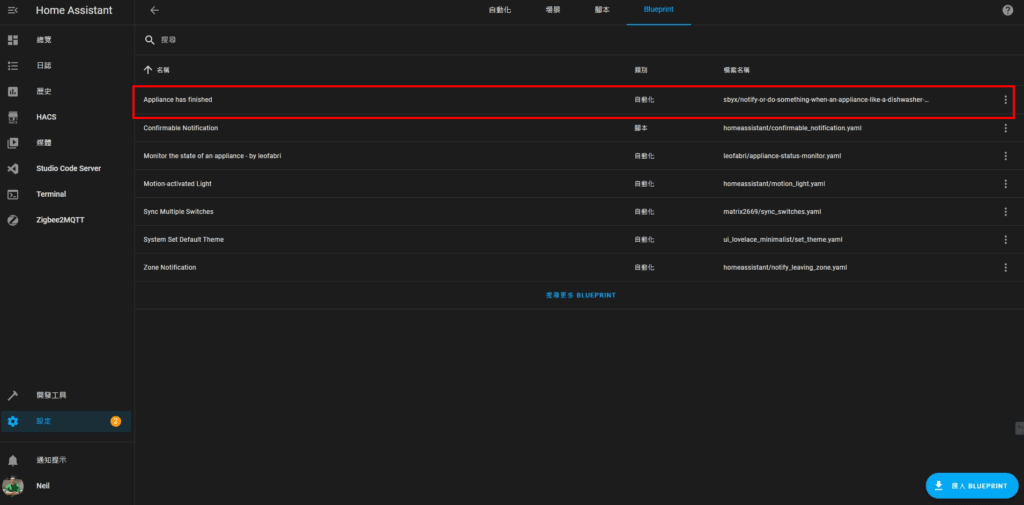
在 Fourm 中找到「IMPORT BLUEPRINT」按鈕,依序操作,最後就會在 Blueprint 列表看到「Appliance has finished」這個 Blueprint。

Step 2. 使用「Appliance has finished」Blueprint 進行自動化設定
如果不知道怎麼進入到這個自動化設定列表的畫面,可以參考前一篇:https://neiltw.com/home-assistant-automation-setup-guide/
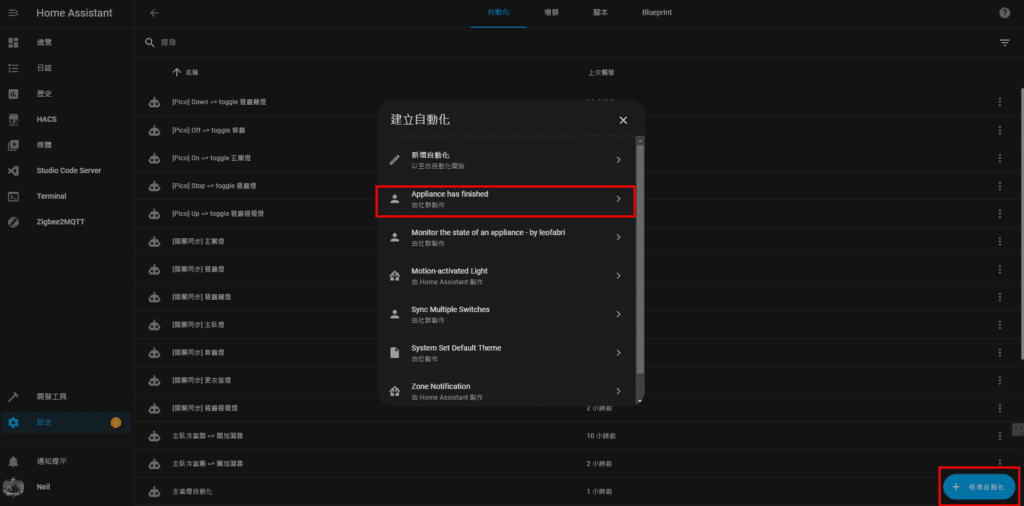
Step 2-1. 點擊「新增自動化」➜ 選擇「Appliance has finished」
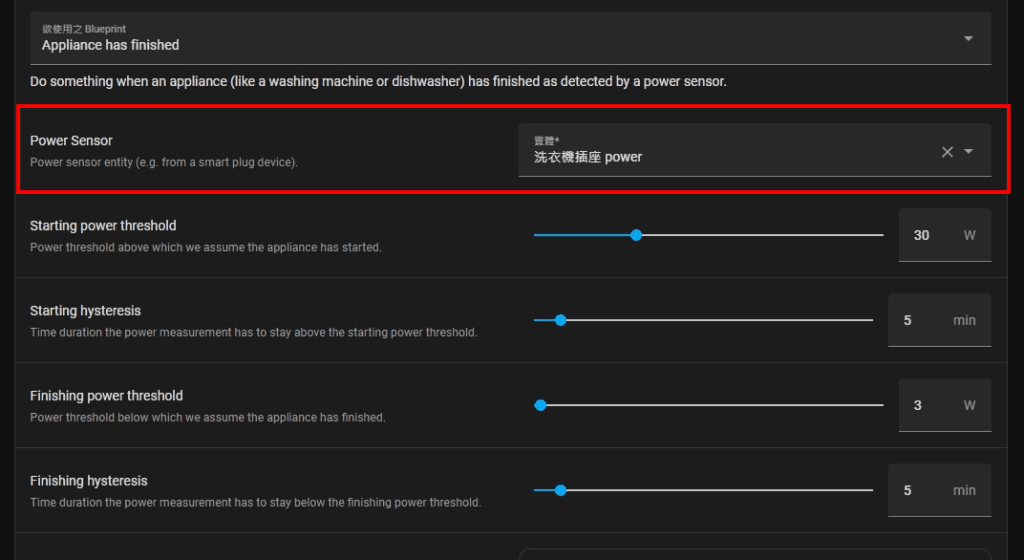
Step 2-2. 設定「Power Sensor」
在「Power Sensor」選擇用來監測洗衣機用電功率的裝置
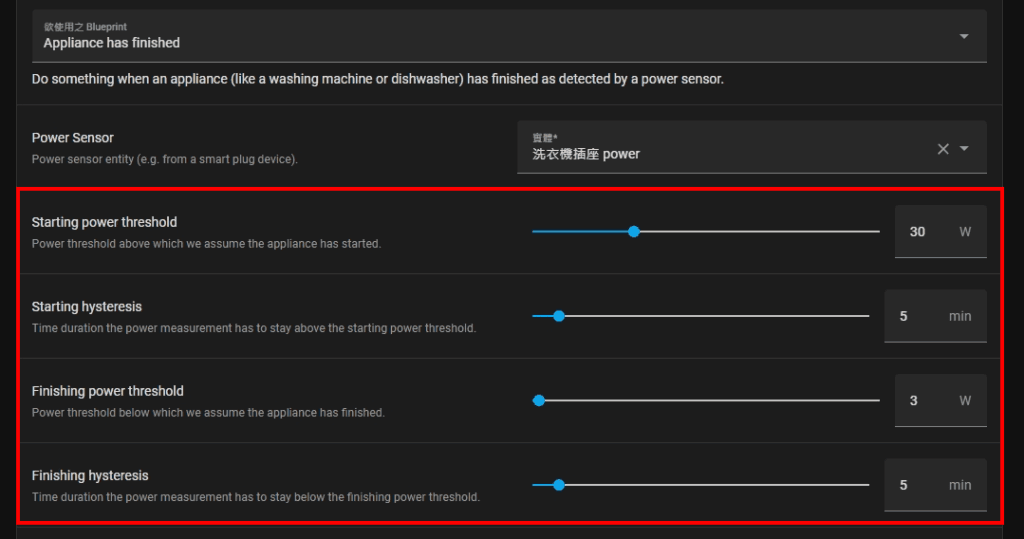
Step 2-2. 監測數值設定
- Starting power threshold:功率閾值,高於該閾值則假設設備已啟動。這裡我的設定是 30 W
- Starting hysteresis:功率高過閾值多久才算真的啟動?我的設定是 5 min
- Finishing power threshold:功率閾值低於該閾值,則假設設備已結束。我設定 3 W
- Finishing hysteresis:功率低於閾值多久才算真的結束?我設定 5 min
以上數值可以視狀況調整,以上的設定是我目前嘗試最適合我們家的設定。
Step 2-3. 設定完成時 Action
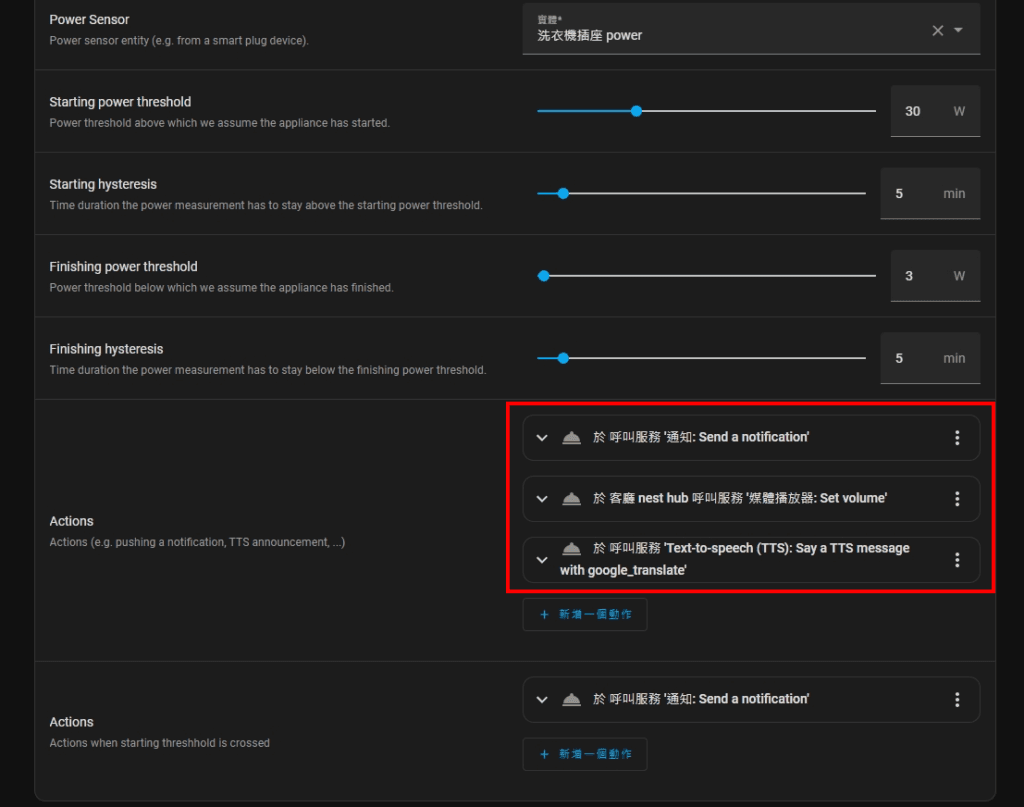
這裡我設定了三個 actions:
- 「通知: Send a notification」:發推播通知到家庭成員的手機。
- 「媒體播放器: Set volume」:設定接下來要播放語音通知的智慧音箱音量 (避免當下原本的音量太大或太小)。
- 「Text-to-speech(TTS): Say a TTS message with google_translate」:透過 Google Assistant 服務從智慧音箱播放語音通知。
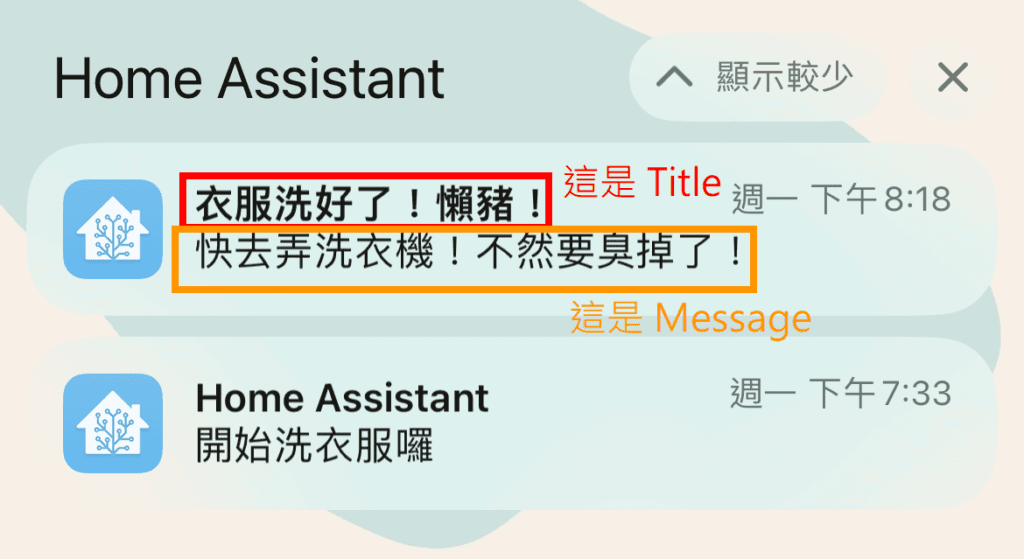
Step 2-3-1. 設定「通知: Send a notification」
- 「服務」選擇 “通知: Send a notification”
- 「Message」、「Title」填你喜歡的文字

Step 2-3-2. 設定「媒體播放器: Set volume」
- 「服務」選擇 “媒體播放器: Set volume”
- 「目標」透過裝置或實體選擇你的智慧音箱
- 「Level」設定想要的音量,我設定 0.6 也就是 60%

Step 2-3-3. 設定「Text-to-speech(TTS): Say a TTS message with google_translate」
- 「服務」選擇 “Text-to-speech(TTS): Say a TTS message with google_translate”
- 「entity_id」選擇你的智慧音箱
- 「Message」填你想要語音通知的內容
- 「language」填想要的語音語言,這裡我填 “zh-tw”

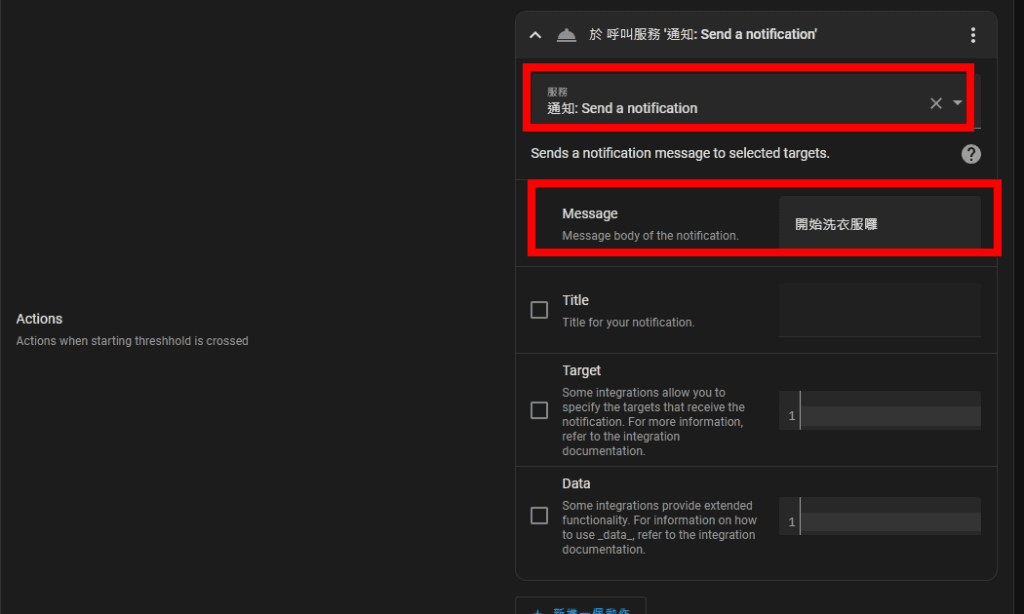
Step 2-4. 設定開始時 Action
- 「服務」選擇 “通知: Send a notification”
- 「Message」、「Title」填你喜歡的文字
以上就是使用 Blueprint 快速完成自動化設定的操作步驟,從此就不用再煩惱怎麼合理地設定觸發 Trigger、判斷條件 Condition、動作 Action,使用 Blueprint 把自家合適的智慧裝置整合,用這個方式設定自動化 (Automation) 就更容易啦!

感謝分享!!
超級實用