就像是電腦、手機一樣,Home Assistant 也是需要備份的,不管是升級更換設備或是系統掛掉復原都會非常方便,雖然在系統更新和附加元件更新的時候都會有備份的選項,但透過 Google Drive Backup 自動備份,可以讓你更輕鬆找回過去某個時刻的系統備份,隨時想要復原都沒問題 👍 非常建議在 Home Assistant 系統啟動的初期儘早設定這個附加元件喔!
目錄
Step 1. 新增附件元件儲存庫 (Add-on repositories)
因為 Google Drive Backup 不是 Home Assistant 原生內建的 Add-on,所以需要新增 repository 才能安裝。
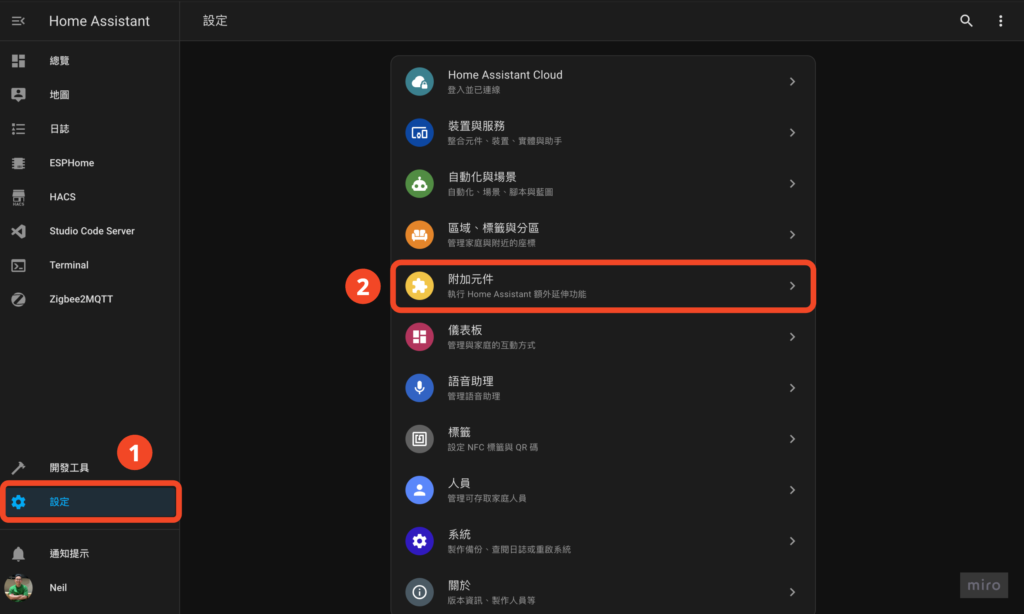
- 左側「設定」
- 點選「附加元件」
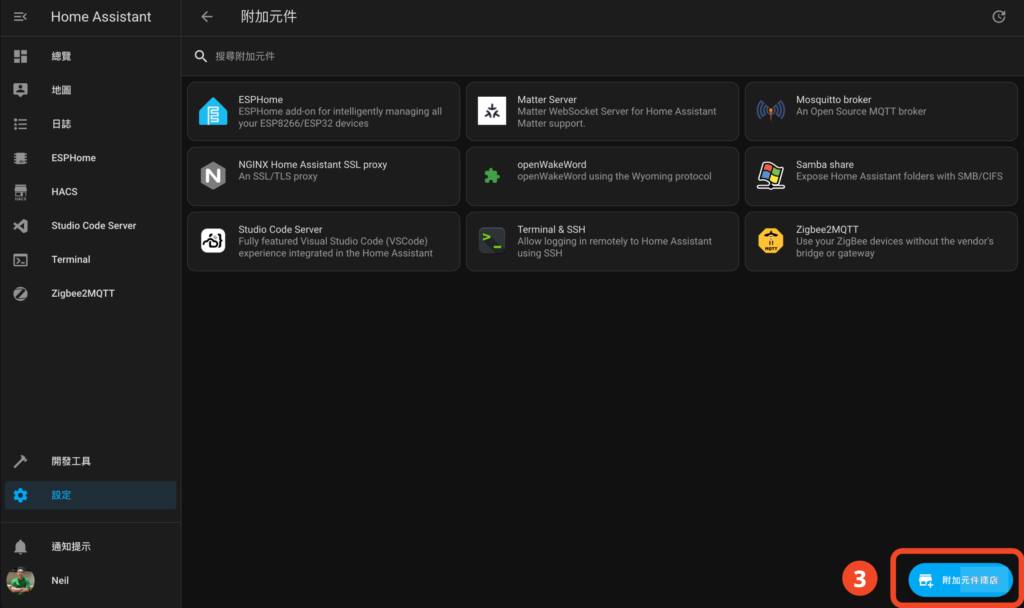
- 點擊右下角「附加元件商店」
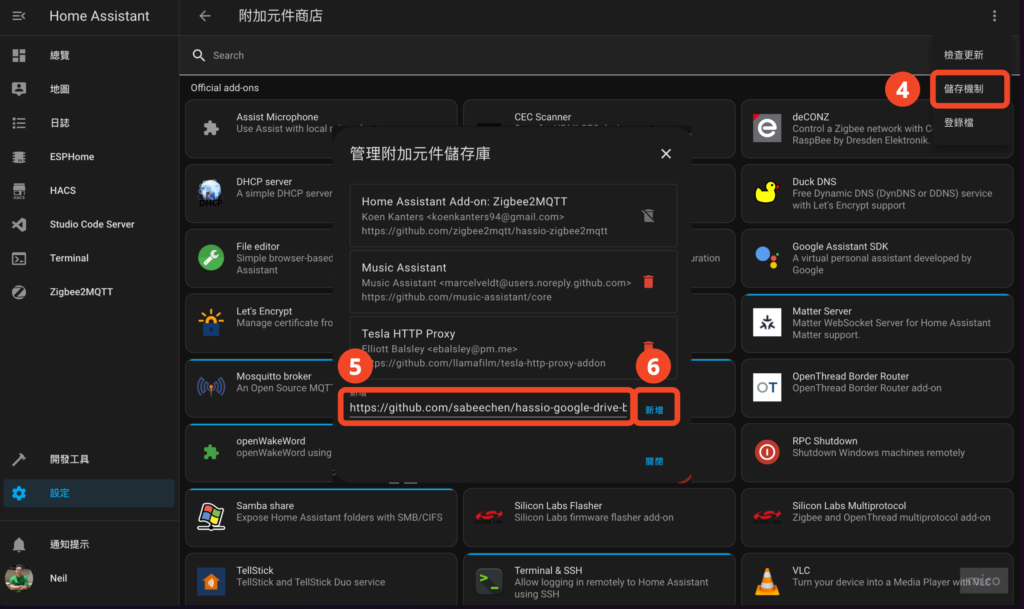
- 右上角「… > 儲存機制」 (這中翻好奇怪 😅)
- 輸入框貼上「https://github.com/sabeechen/hassio-google-drive-backup.git」
- 點擊「新增」
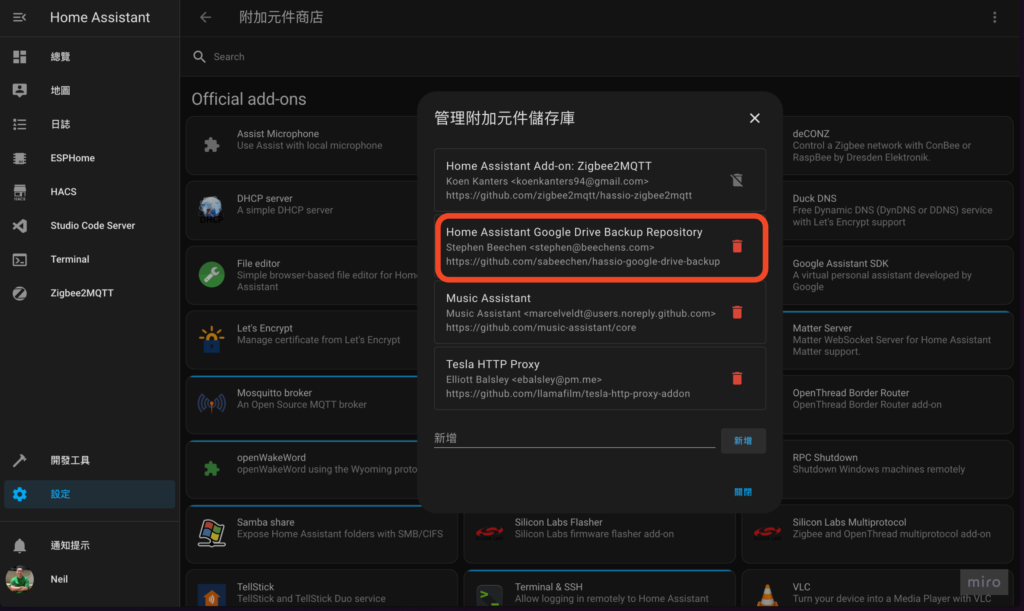
Repository 新增完成!
Step 2. 安裝 Google Drive Backup Add-on
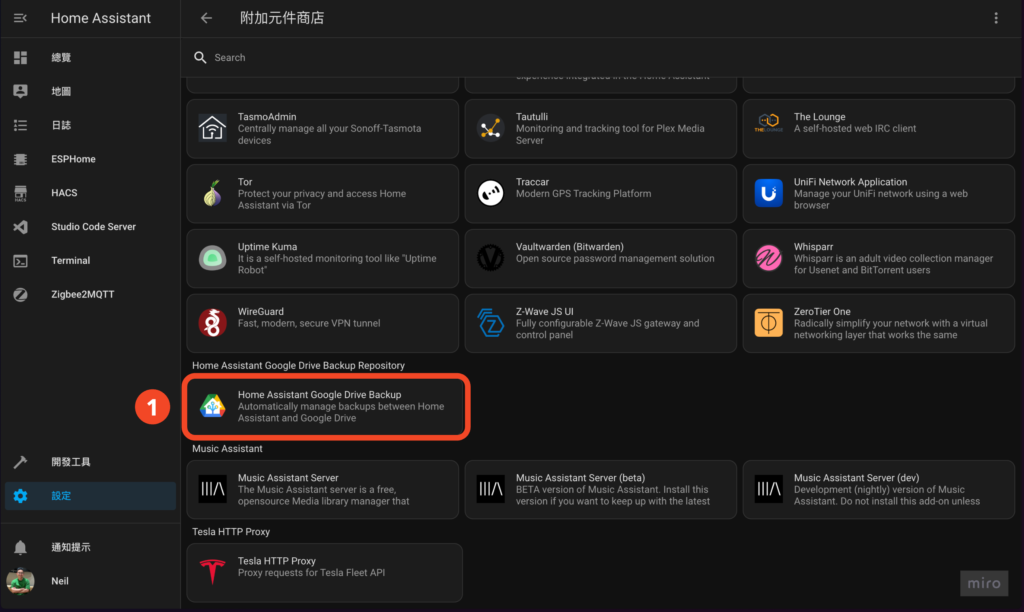
- 點選「Home Assistant Google Drive Backup」
如果找不到就重整頁面應該就有了,如果還是沒有,退回上一步確認 repository 有沒有新增成功。
- 點擊「安裝」

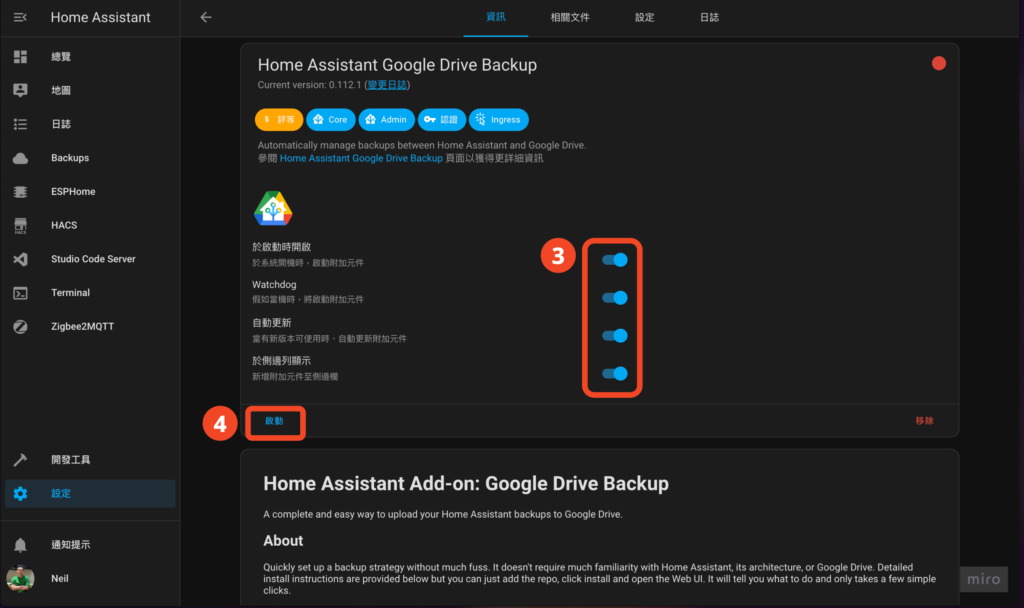
- 開啟「Watchdog」(必要)、「自動更新」(選擇)、「於側邊欄顯示」(選擇)
- 點擊「啟動」
Step 3. 設定 Google Drive Backup
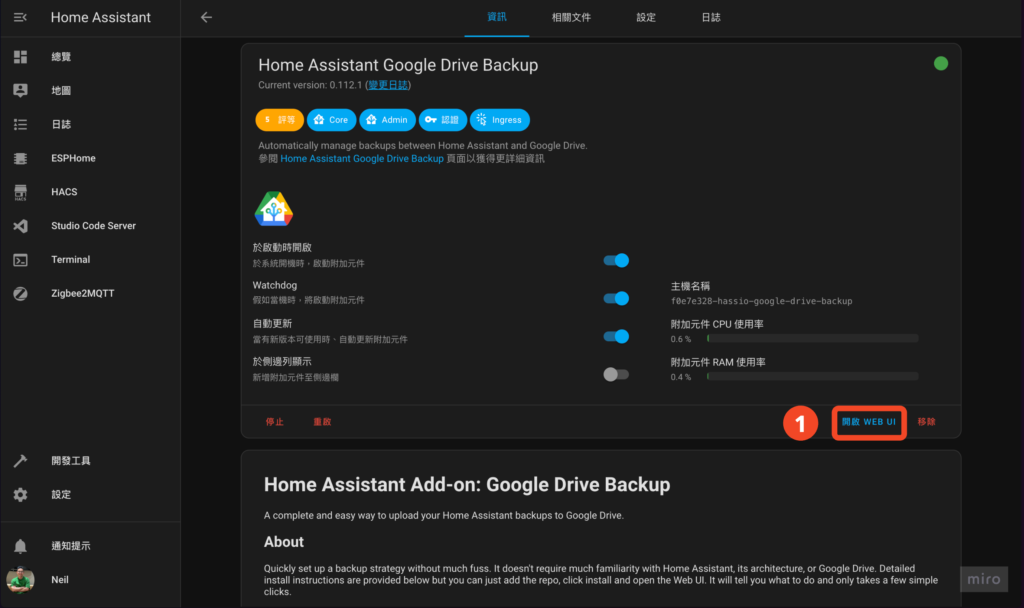
- 點擊「開啟 WEB UI」
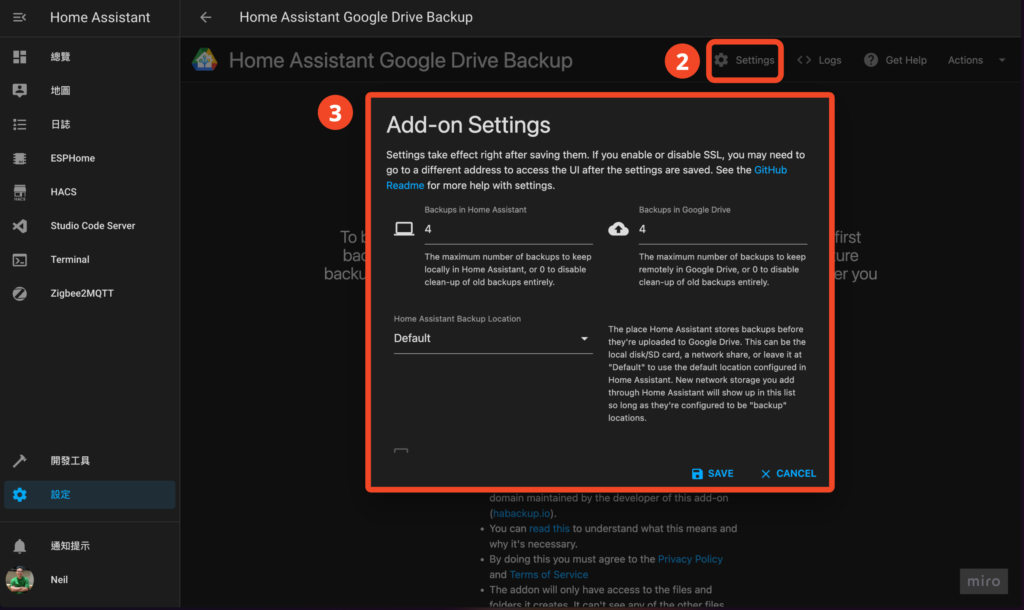
- 點擊「Setting」
- 調整設定,這裡可以依照需要自行設定,但有幾個設定非常建議要做:
- Password:加強一些安全性,在你未來復原的時候需要輸入密碼才能使用,所以如果有人壞壞拿到你的備份檔如果不知道密碼也不能使用。
- Keep Generational Backups:這個設定可以用來保留較舊版本的備份檔,在這裡我設定 3 days, 3 weeks, 3 months, 1 year,你也可以依照你的需求設定。
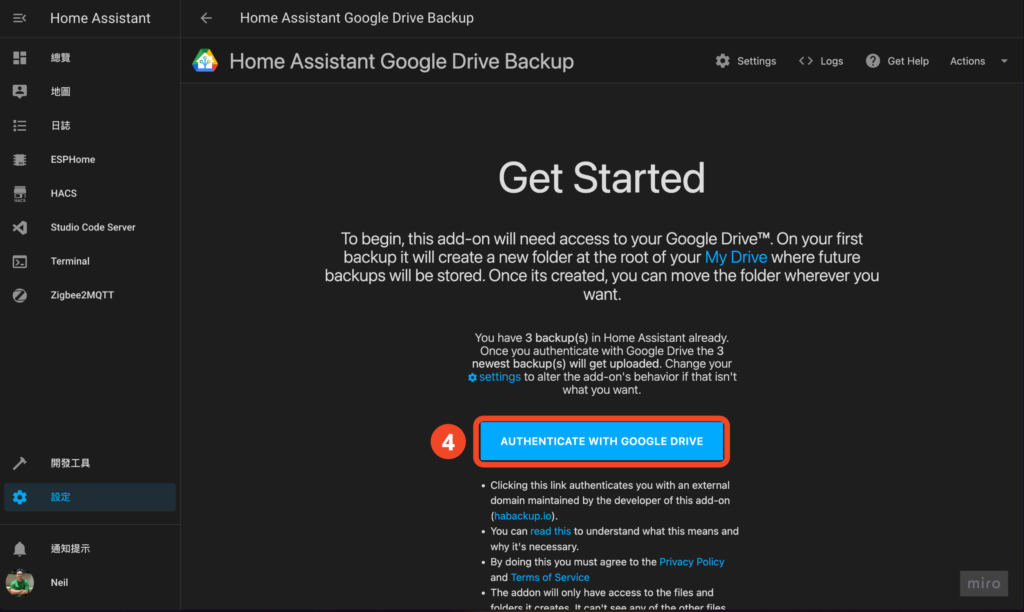
- 點擊「AUTHENTICATE WITH GOOGLE DRIVE」
💡以我的狀況每個備份檔案大約 100mb 左右,不同系統設定複雜度可能會產生不同容量大小的備份檔案,建議可以參考你的 Google Drive 容量來考慮要不要另開一個 Google 帳號專門做備份
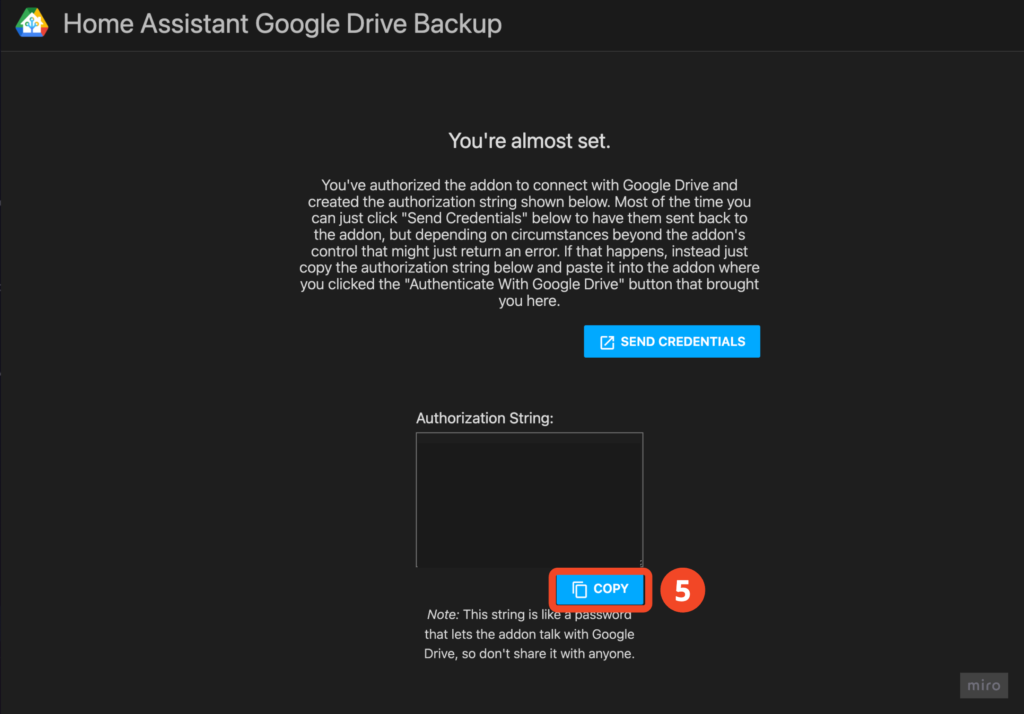
- 登入完成後會拿到一串金鑰,點擊「COPY」
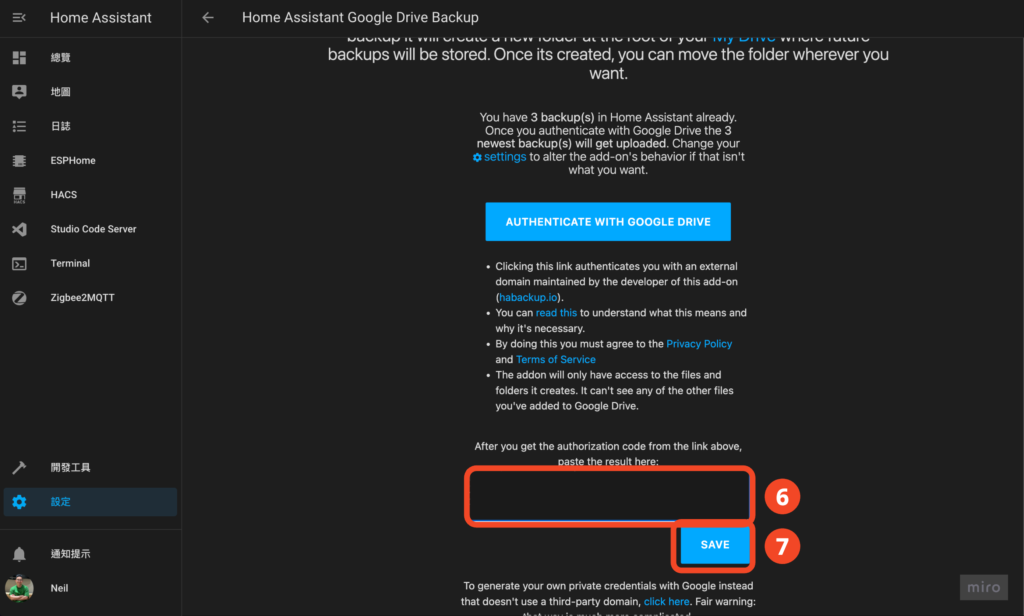
- 回到前一個畫面,在下方輸入框貼上金鑰
- 點擊「SAVE」
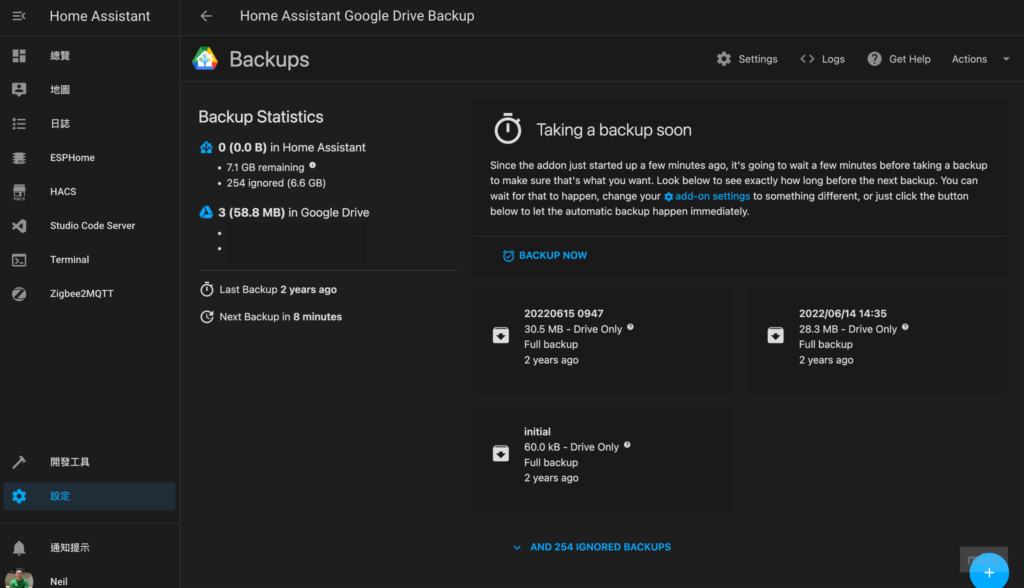
大功告成!
最後看到這個畫面就是成功啦!我竟然 HA 用了兩年都沒備份,真是太佩服我自己的運氣了 🤣 你千萬不要學!
我看過太多人因為沒備份 HA 掛掉之後欲哭無淚,我之前真的是太懶了 🤣

感謝Neil大分享與教學,今天成功安裝但很多設定還不懂,要多多爬文章了。
這篇太有用了 感謝Neil近期快速產出😂😂😂
Hi M, 感謝鼓勵,希望有幫到你囉!竟然被發現最近發文頻率比較高了 🤣